Threed Bussiness Theme
Thank you for your purchase! If you have any questions that you feel should have been in this document, please feel free to contact us through our Support. Thanks!
Also you'll need some knowledge of bootstrap, css, jquery to edit this theme.
Version: 1.0
Install the Theme
Pre Installation Knowledge
If you are new to Wordpress, please learn how to use wordpress or wordpress themes along with the other features. Theme documentation is for the users who knows to handle Wordpress.
Please find few links from where you can learn about wordpress.
There are two way to upload themes in Wordpress and we are describing them both now.
You can either upload all theme files via Wordpress Theme Uploader or you can use FTP.
Using Theme Uploader :
Step 1 : Go to Dashboard Appearance Themes
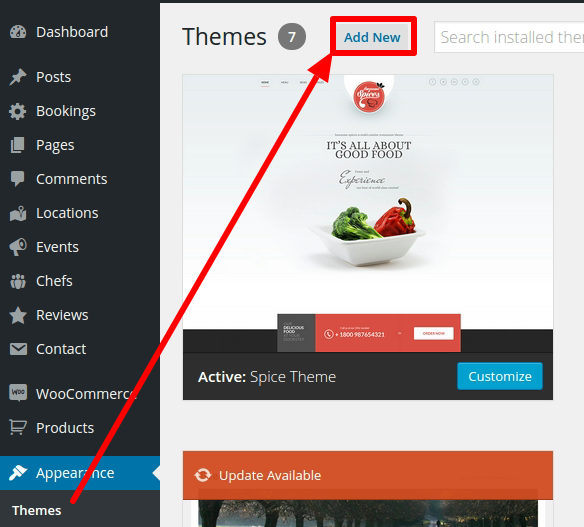
Step 2 : Add New Upload
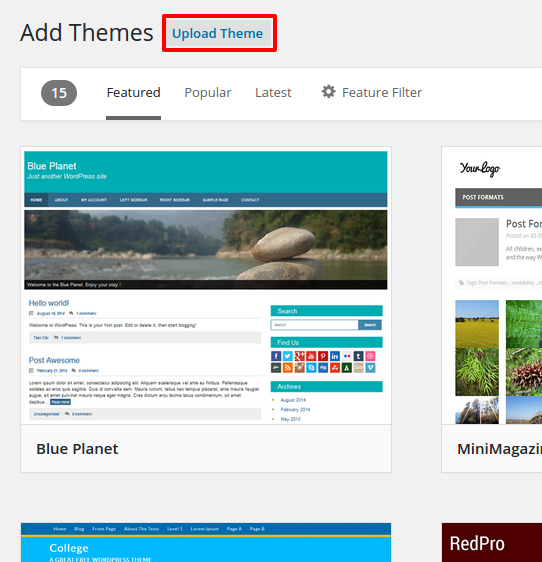
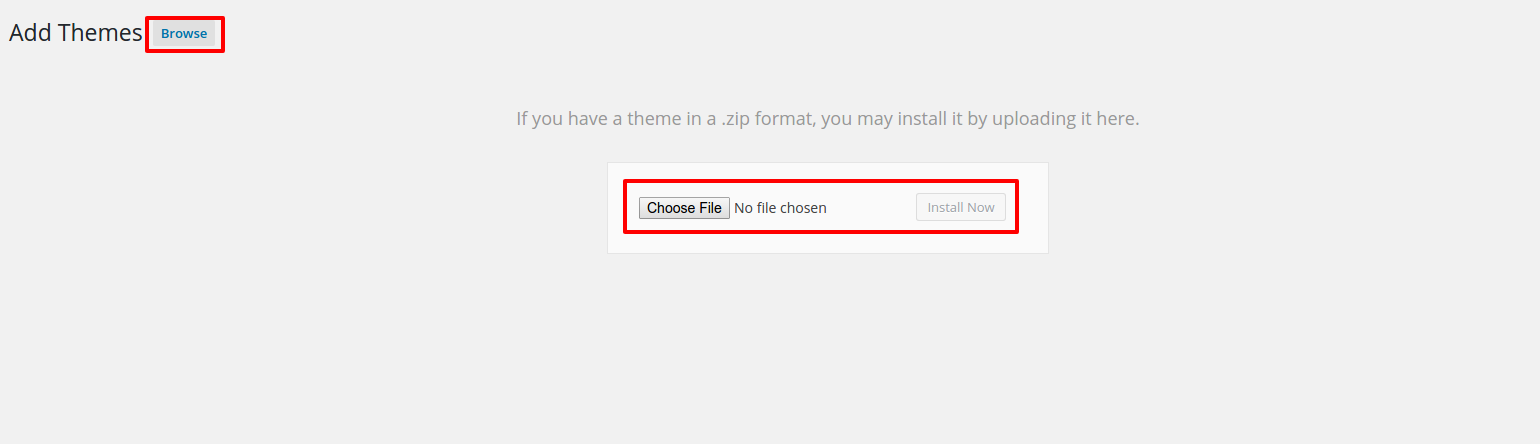
Step 3 : Choose creative.zip file and click into the Install Now.
Using FTP Clients:
Assuming that you know how to use the FTP clients like Filezilla,SmartFTP etc. If you dont have any experience with this please try it with Theme Uploader.
- Step 1 : First login to your FTP account and navigate to your Wordpress root directory and go to
wp-content/themes folder.
- Step 2 : Just Unzip the creative.zip file and check the following files are there :
1. index.php
2. functions.php
3. style.css
- Step 3: If everything is fine, upload the unzipped folder to
wp-content/themes folder.
Activate the Theme:
Theme Plugins
Menu : Appearance Install Plugins
One Click Demo Importer
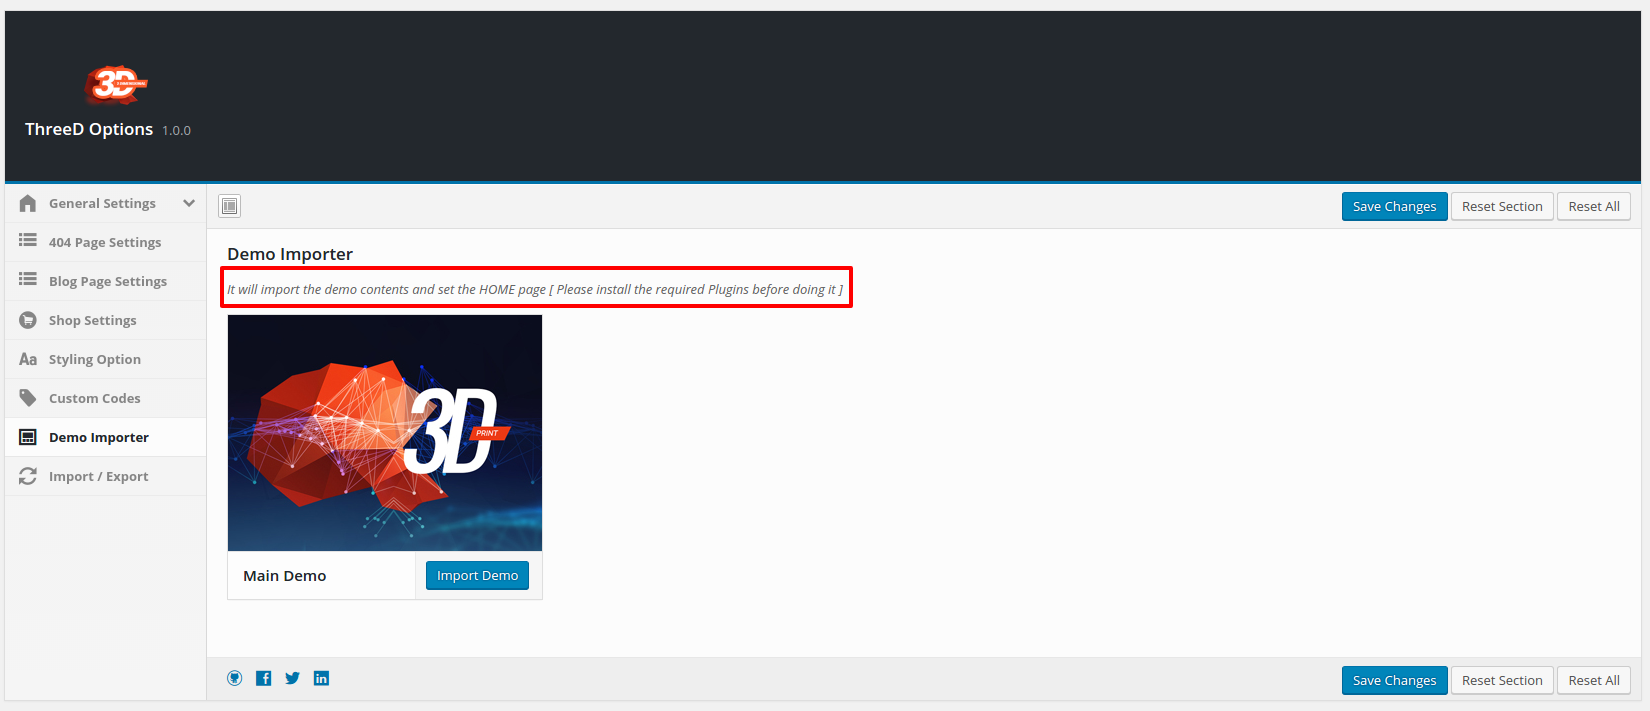
Threed theme have the option of One Click Demo Importer. It will import the demo content as well as it set the Primary Menu, Front Page. This options is in theme option panel. When you activate the theme, you will be redirect it to the theme option panel automatically. One Click Demo importer will import all the demo content except the revolution sliders. You need to import the revolution sliders manually from the Demo Content folder. It is suggested to Import the data after intalling all the required plugins.
Go to Appearnace Threed Options Demo Importer.
After Importing you need to Import the Revolution Slider Files
Demo Content Failure? Click here
Revolution Slider Import Files
Revolution Slider Import File : Theme folder DemoContent SliderFiles
Home Page Banner Slider : home_slider.zip
Home Page Inner Slider : intro_slider.zip
Inner Page Banner Slider : innerpage_bannerslider.zip
Sidebar Image Slider : sidebar_slider.zip
Creative Agency Home Slider : homeslider_creative_agency.zip
Creative Agency Home Inner Slider : homeslider_creative_agency_content_slider.zip
Architect Home Inner Slider : homeslider_architect.zip
Menu Settings
To set the Menus, Go Appearance Menus.
- Theme contains two Menu Area 1. Primary Menu and 2 Footer Menu.
- You can add or select the Pages, categories and etc to show in the Menus.

Threed Page Settings
Default Settings for Pages

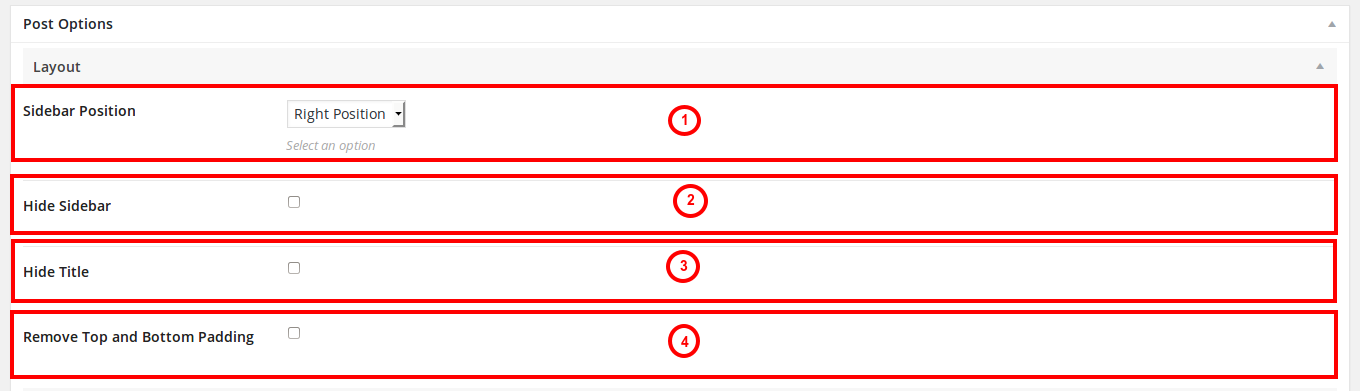
- Layout Settings:

-
- 1. Sidebar Postion : You can easily set the sidebar postions for each and every page.
- 2. Hide Sidebar : Even you can check this on to remove the Sidebar from your page.
- 3. Hide Title : If you dont need to show the Page Title you can check it off.
- 4. Remove Top and Bottom Padding : Click on the this checkbox to remove gap(Padding) from content area.
- Menu Options:
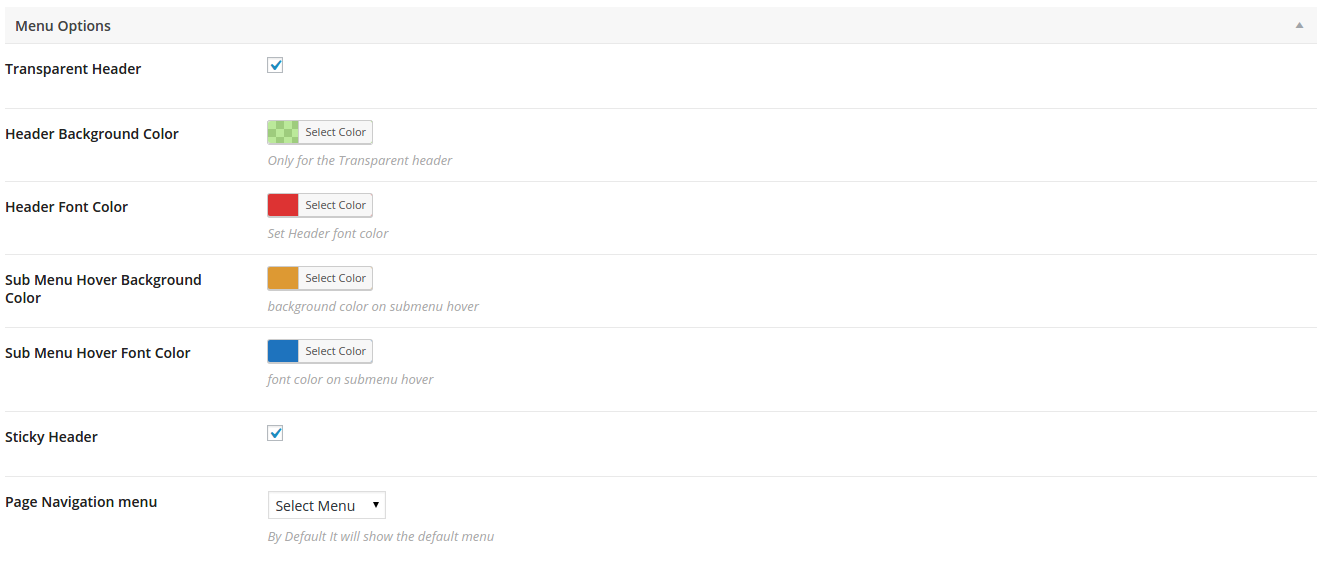
-
- 1. Transparent Header : You can make header background transparent by click on this checkbox.
- 1.1. Transparent Header Background Color: You can set transparent background color with opacity options
- 1.2. Transparent Header Font Color: You can set transparent header text color
- 1.3. Transparent Header Submenu Color: You can set background of submenu for transparent header
- 1.4. Transparent Header Submenu Text Color: You can set text color of transparent header for submenu.
- 2. Sticky Header : you can easily make menu Sticky by clicking on this checkbox.
- 3. Show Menu : You can show & hide menu to each pages .
- 4. Main navigation menu : You can select menu that you want to show on this page .
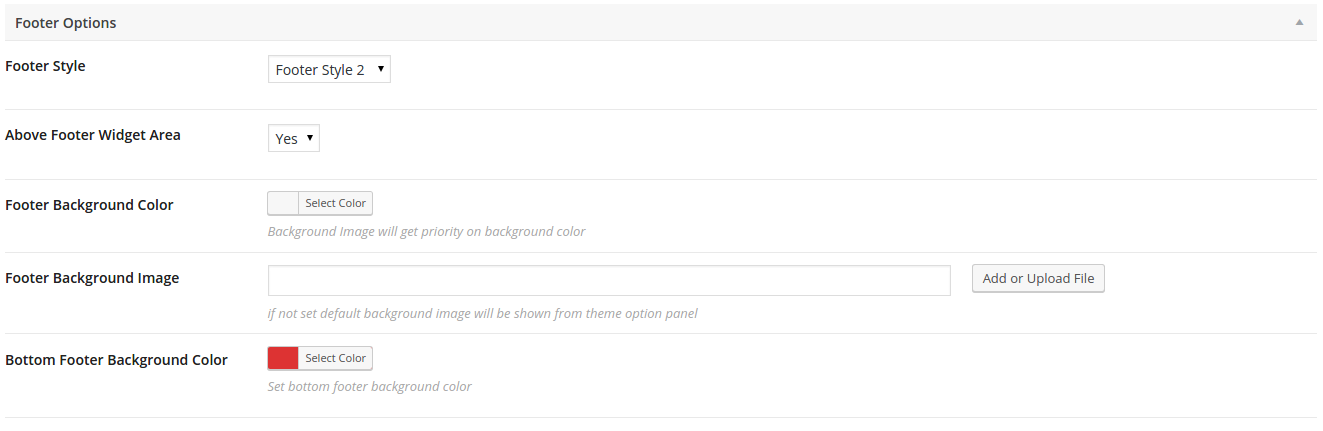
- Footer Options:
-
- 1. Transparent Header : You can make header background transparent by click on this checkbox.
- 2. Sticky Header : you can easily make menu Sticky by clicking on this checkbox.
- 3. Show Menu : You can show & hide menu to each pages .
- 4. Main navigation menu : You can select menu that you want to show on this page .
Threed Posts Settings
Default Settings for Posts

- Layout Options:
-
- 1. Sidebar Postion : You can easily set the sidebar postions for each and every posts.
- 2. Hide Sidebar : Even you can check this on to remove the Sidebar from your posts.
- 3. Hide Title : If you dont need to show the Page Title you can check it off.
- 4. Remove Top and Bottom Padding : Click on the this checkbox to remove gap(Padding) from content area.
- Menu Options:
-
- 1. Transparent Header : You can make header background transparent by click on this checkbox.
- 2. Sticky Header : you can easily make menu Sticky by clicking on this checkbox.
- 3. Show Menu : You can show & hide menu to each pages .
- 4. Main navigation menu : You can select menu that you want to show on this page .
Threed Post Formats
Standard, Video, Galllery and Image post formats are supported by threed theme. Settings are available for Gallery and Video formats, which has been described below.
-
- 1.Gallery Post format :
- Uploaded images will be shown in a carousel as a featured image with the respective posts.

-
- 2.Video Post format :
- Uploaded video will be shown as featured image with the respective posts.

Threed Post type
Custom Post type for this theme is been defined in the Threed Custom Post Type Plugins. If Installed you will get the following Post types with its features.
-
Services Post Type
Here we described only the settings for Service Post Type.
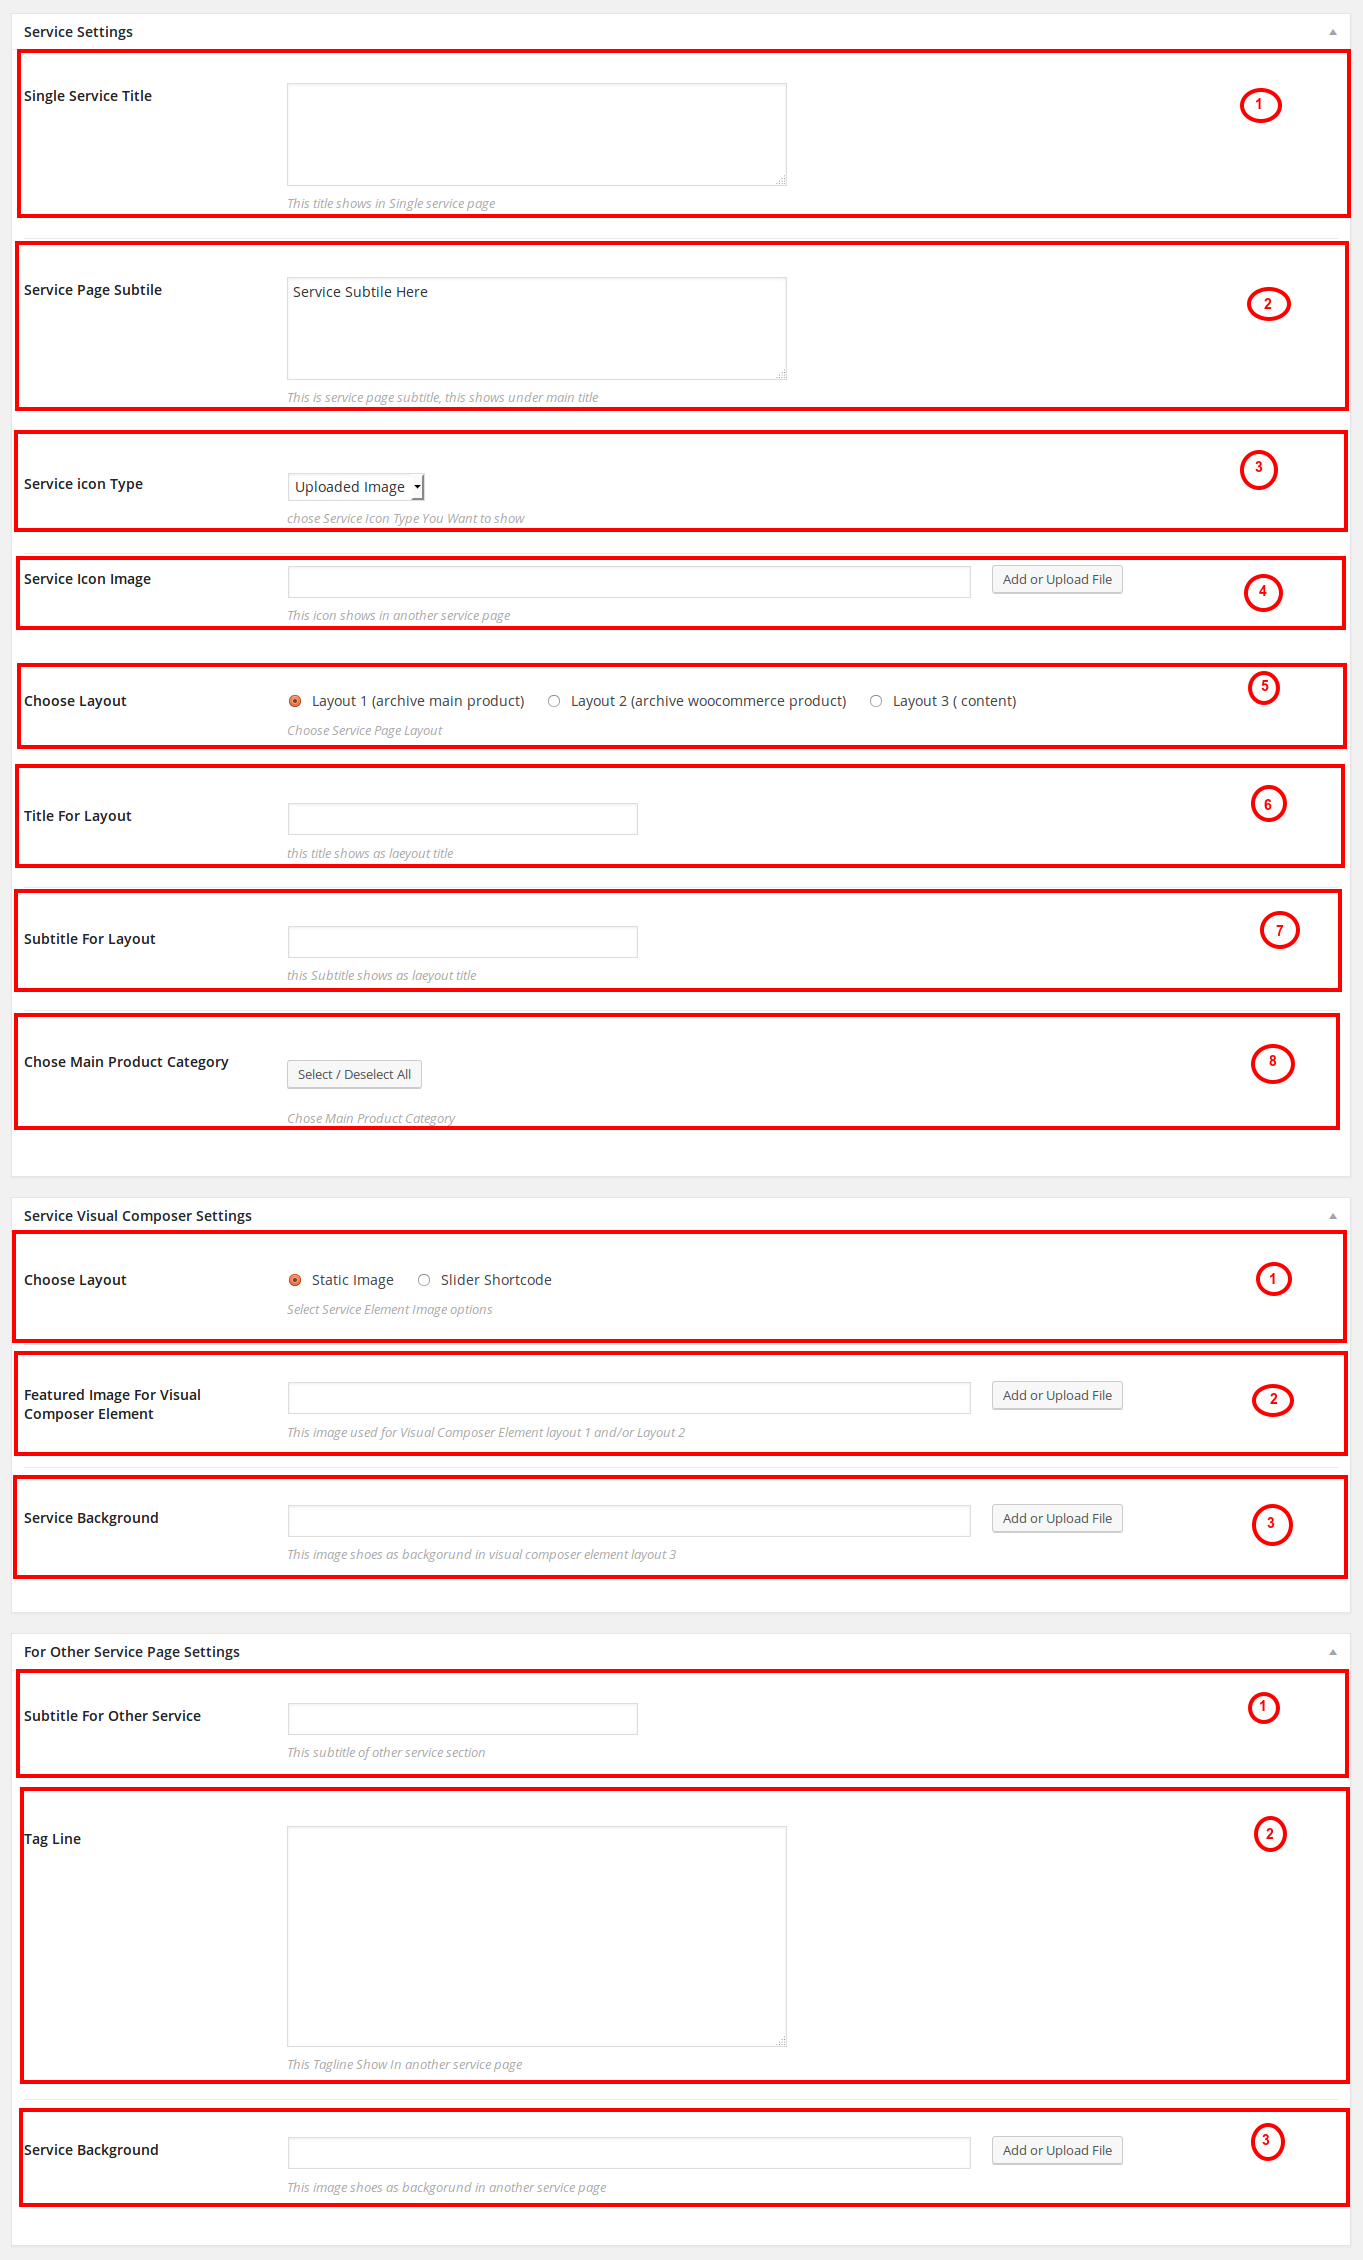
Service Settings
- 1. Add Single Service Title here .
- 2. Add Service Page Subtile here .
- 3. Service icon Type from the select box .
- 4. You can upload image from here since we have selected icon type as image . You can add fontawesome icon if select icon type as fontawesome.
- 5. Choose Layout from these radio buttons .
- 6. Add Title For Layout in the text field.
- 7. Add Subtitle For Layout in the text field.
- 8. Chose Main Product Category .
Service Visual Composer Settings
- 1. Chose layout to your services element .
- 2. Upload Featured Image For Visual Composer Element. This image used for Visual Composer Element layout 1 and/or Layout 2. If you select layout as static then you can upload image from . If you select layout as slider then you need to add shortcode in the text box.
- 3. Uouload image for Service Background from here . This image shows as background in visual composer element layout 3
For Other Service Page Settings
- 1. Add Subtitle For Other Service in the text field.
- 2. Add Tag line in the text box. This Tagline Show In another service page .
- 3. Add Services background From here.
-
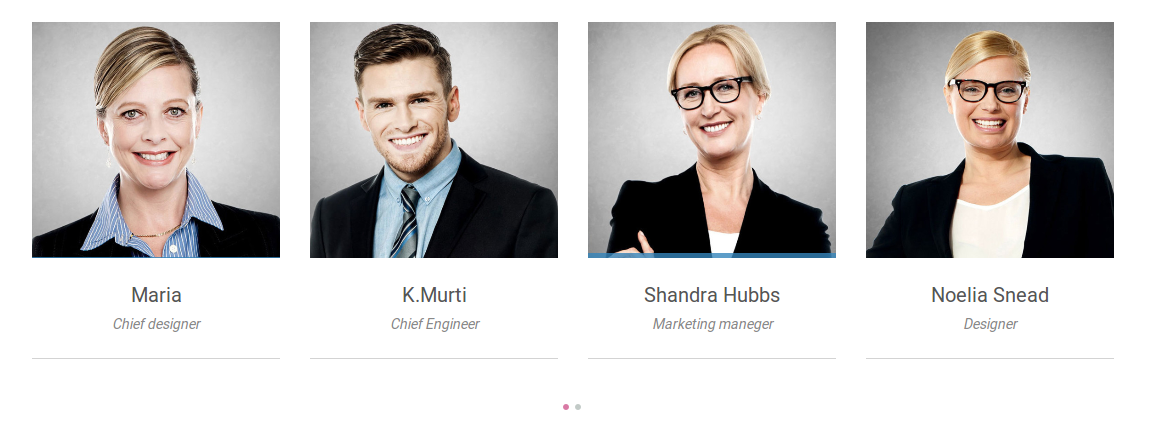
Team Member Post Type
Here we described only the settings for Events Post Type.

Team Member Settings
- 1. Add Designation of team member in the text.
-
Main Product Post Type
Here we described only the settings for Testimonial Post Type.
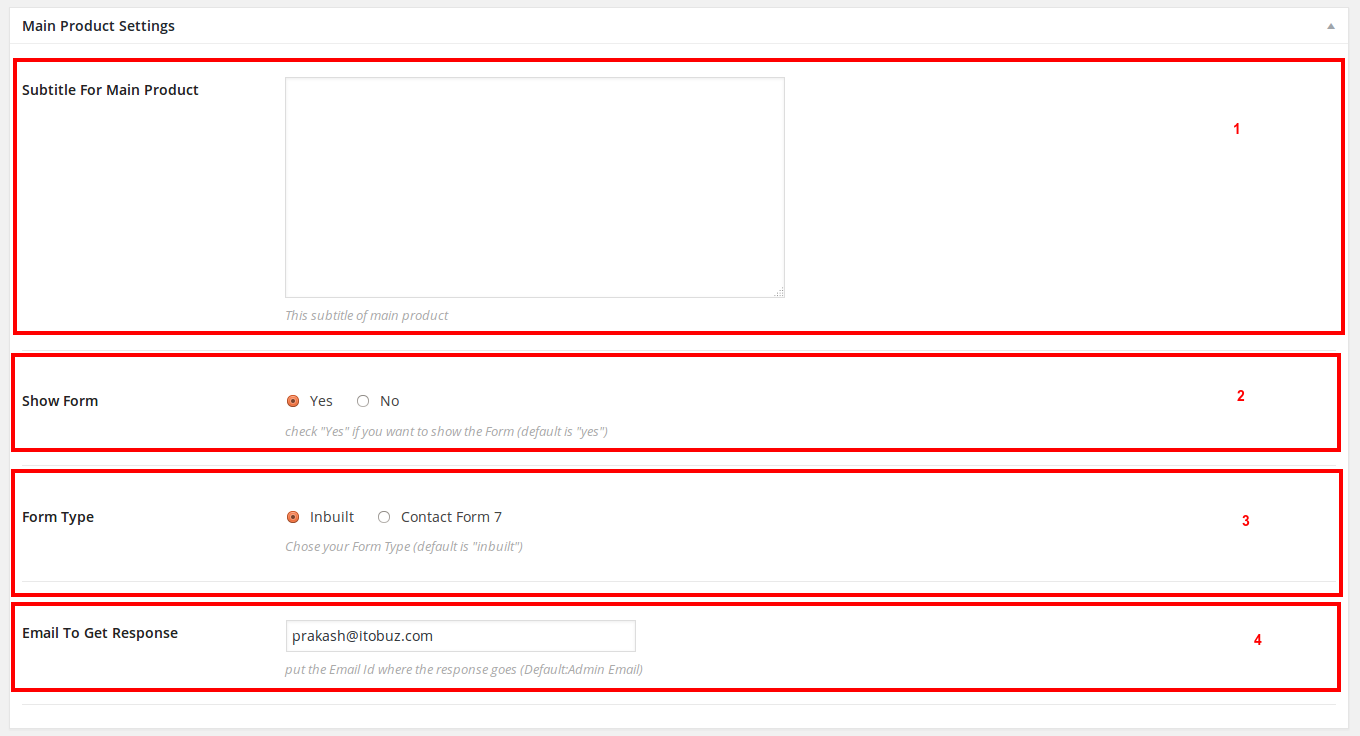
Main Product Settings
- 1. Add Subtitle For Main Product in the textarea field.
- 2. Select "YES" to display form . If you don't want to deisplay form select "NO".
- 3. Select Form Type . If you select inbult it would show our inbult form . If you select contact form 7 then you have to add shortcode of contact form 7.
- 4. Add Email To Get Response
-
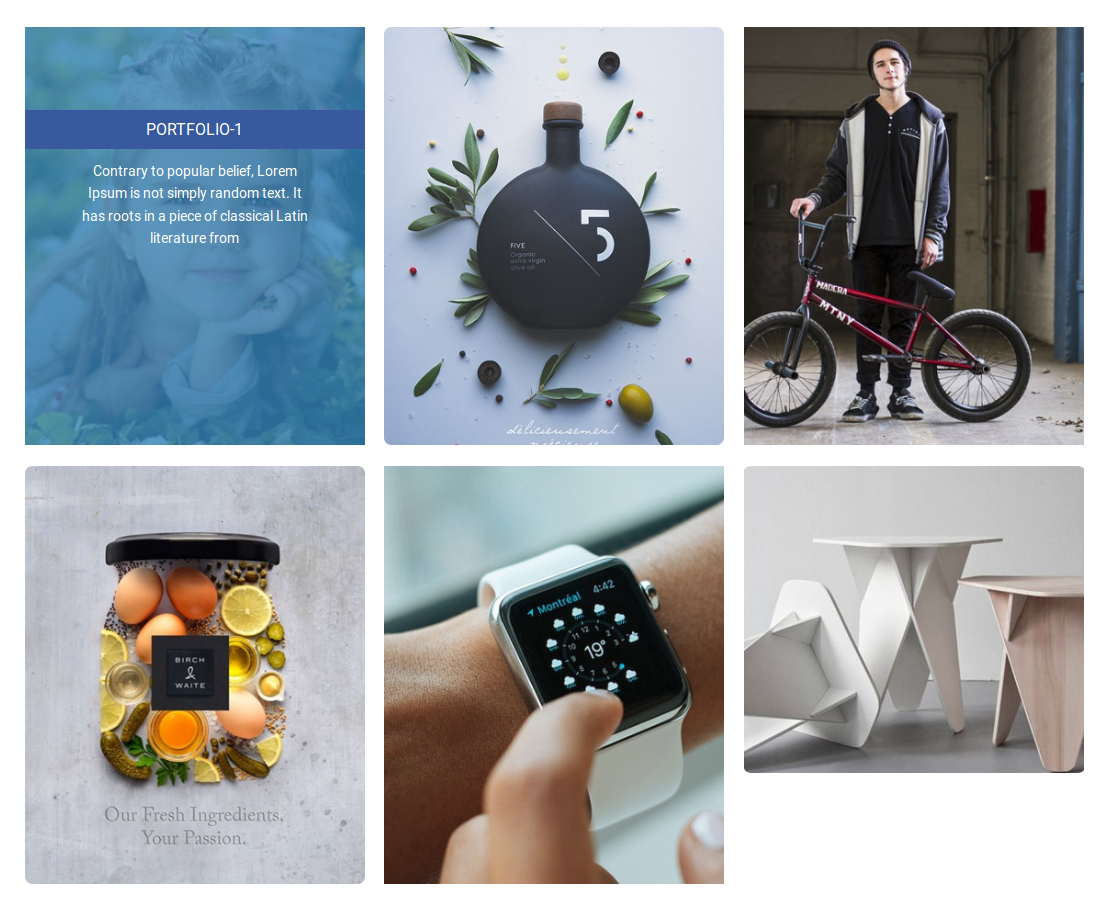
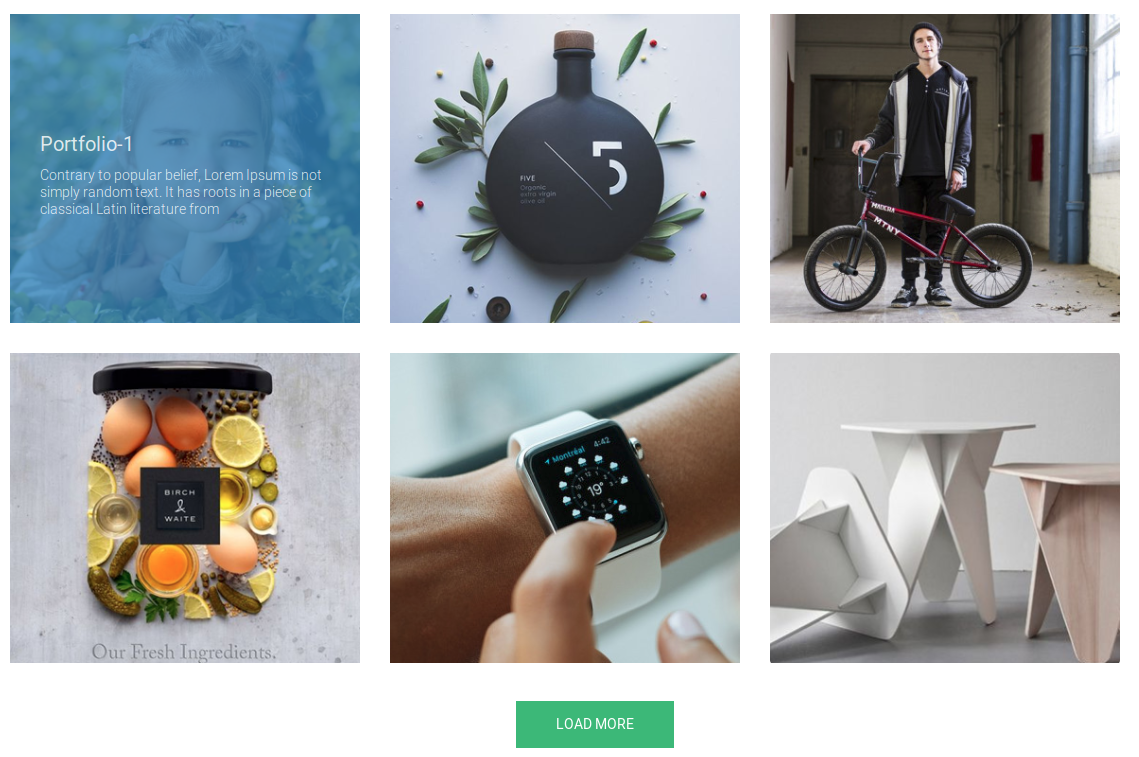
Portfolio Post Type
Here we described only the settings for Portfolio Post Type.

- 1. Click on Add or Upload Files button to upload your portfolio..
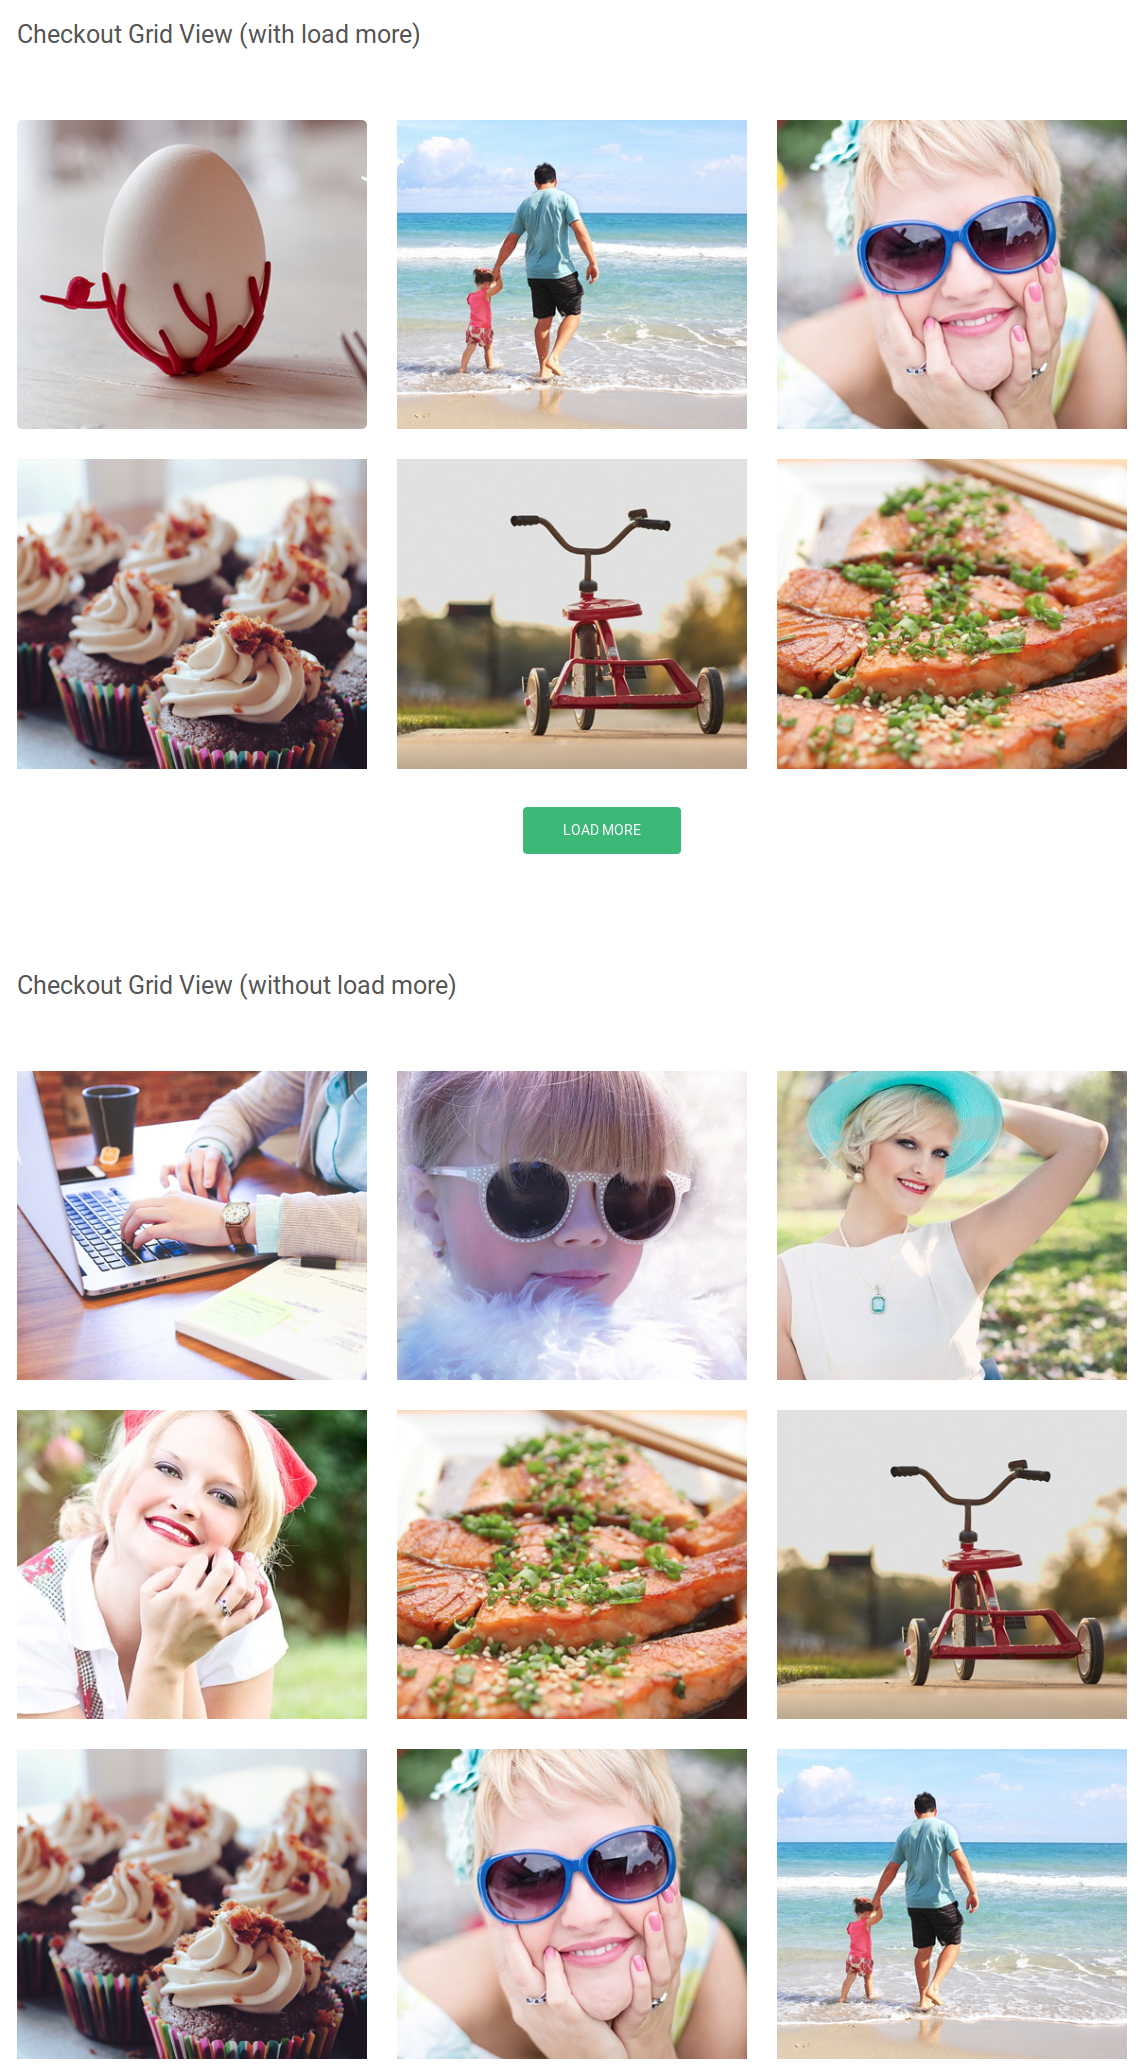
Threed VC Elements
Theme specific Visual Composer elements. These elements will be available only if Threed VC Addons plugin is installed. These elements can be used to create pages. Theme Demo uses all these elements.
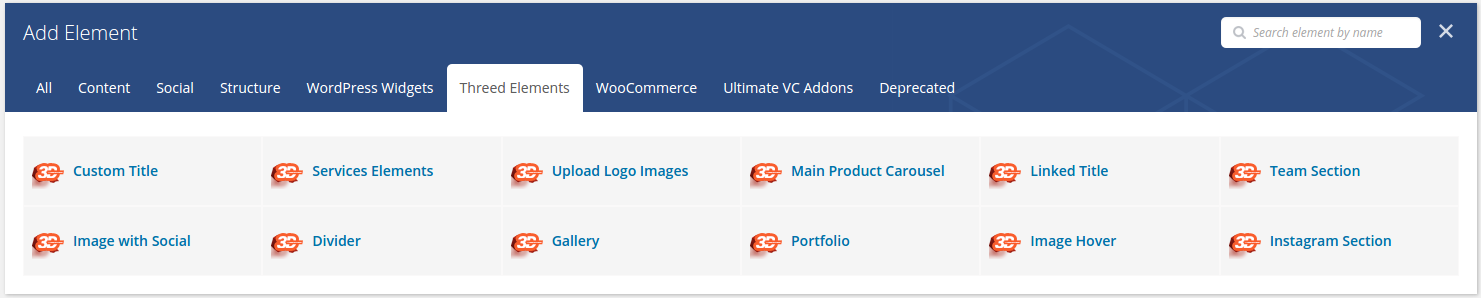
Here we described each and every elements of VC Addons. Please click into the Element images to get the screenshots and details
Threed Custom Title
Click Image to get Detailed Screenshot
|
Click Image to get Detailed Screenshot
|
Click Image to get Detailed Screenshot
|
Click Image to get Detailed Screenshot
|
Click Image to get Detailed Screenshot
|
|
|
|

|
|
|
Click Image to get Detailed Screenshot
|
Click Image to get Detailed Screenshot
|
Click Image to get Detailed Screenshot
|
Click Image to get Detailed Screenshot
|
Click Image to get Detailed Screenshot
|
|
|
|
|
|
|
Click Image to get Detailed Screenshot
|
Click Image to get Detailed Screenshot
|
|
|
|
|
|
|
|
|
Front View VC Elements
Theme specific Visual Composer elements. These elements will be available only if Threed VC Addons plugin is installed. These elements can be used to create pages. Theme Demo uses all these elements.
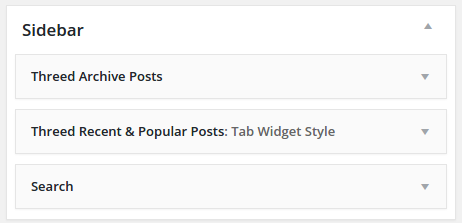
Threed Widgets
Threed Widgtes, Go to Appearance Widgets
-
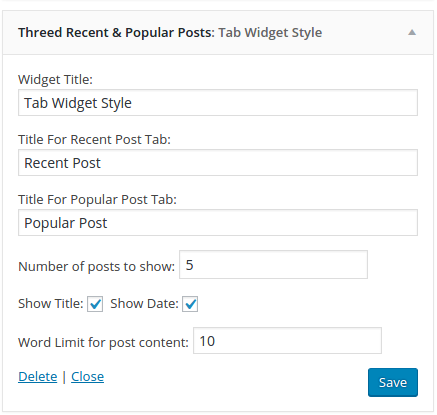
Threed Tabbed Widget for Recent Post and Popular Posts
Backend Settings
|
Backend Settings
- 1. Widget Title
- 2. No.of Post to shown in widget
- 3. Show Post Title [ Yes/NO ]
- 4. Show Post Date [ Yes/NO ]
- 5. Show Post Featured Image [ Yes/NO ]
- 6. Show Post Author Image [ Yes/NO ]
- 7. From category to show the posts.
|
-
Threed Archive Widget
Backend Settings

|
Backend Settings
- 1. Twitter Feed Widget Title
- 2. Screen Name
- 3. Consumer Key
- 4. Consumer Secret
- 5. Access Token
- 6. Access Token Secret
- 7. No.of Tweet to show.
|
ThreeD Options
Appearance ThreeD Options
-
General Settings
- To set Logo,Favicon,Bussiness Icon and Site Loader, Please check out the screenshots below .
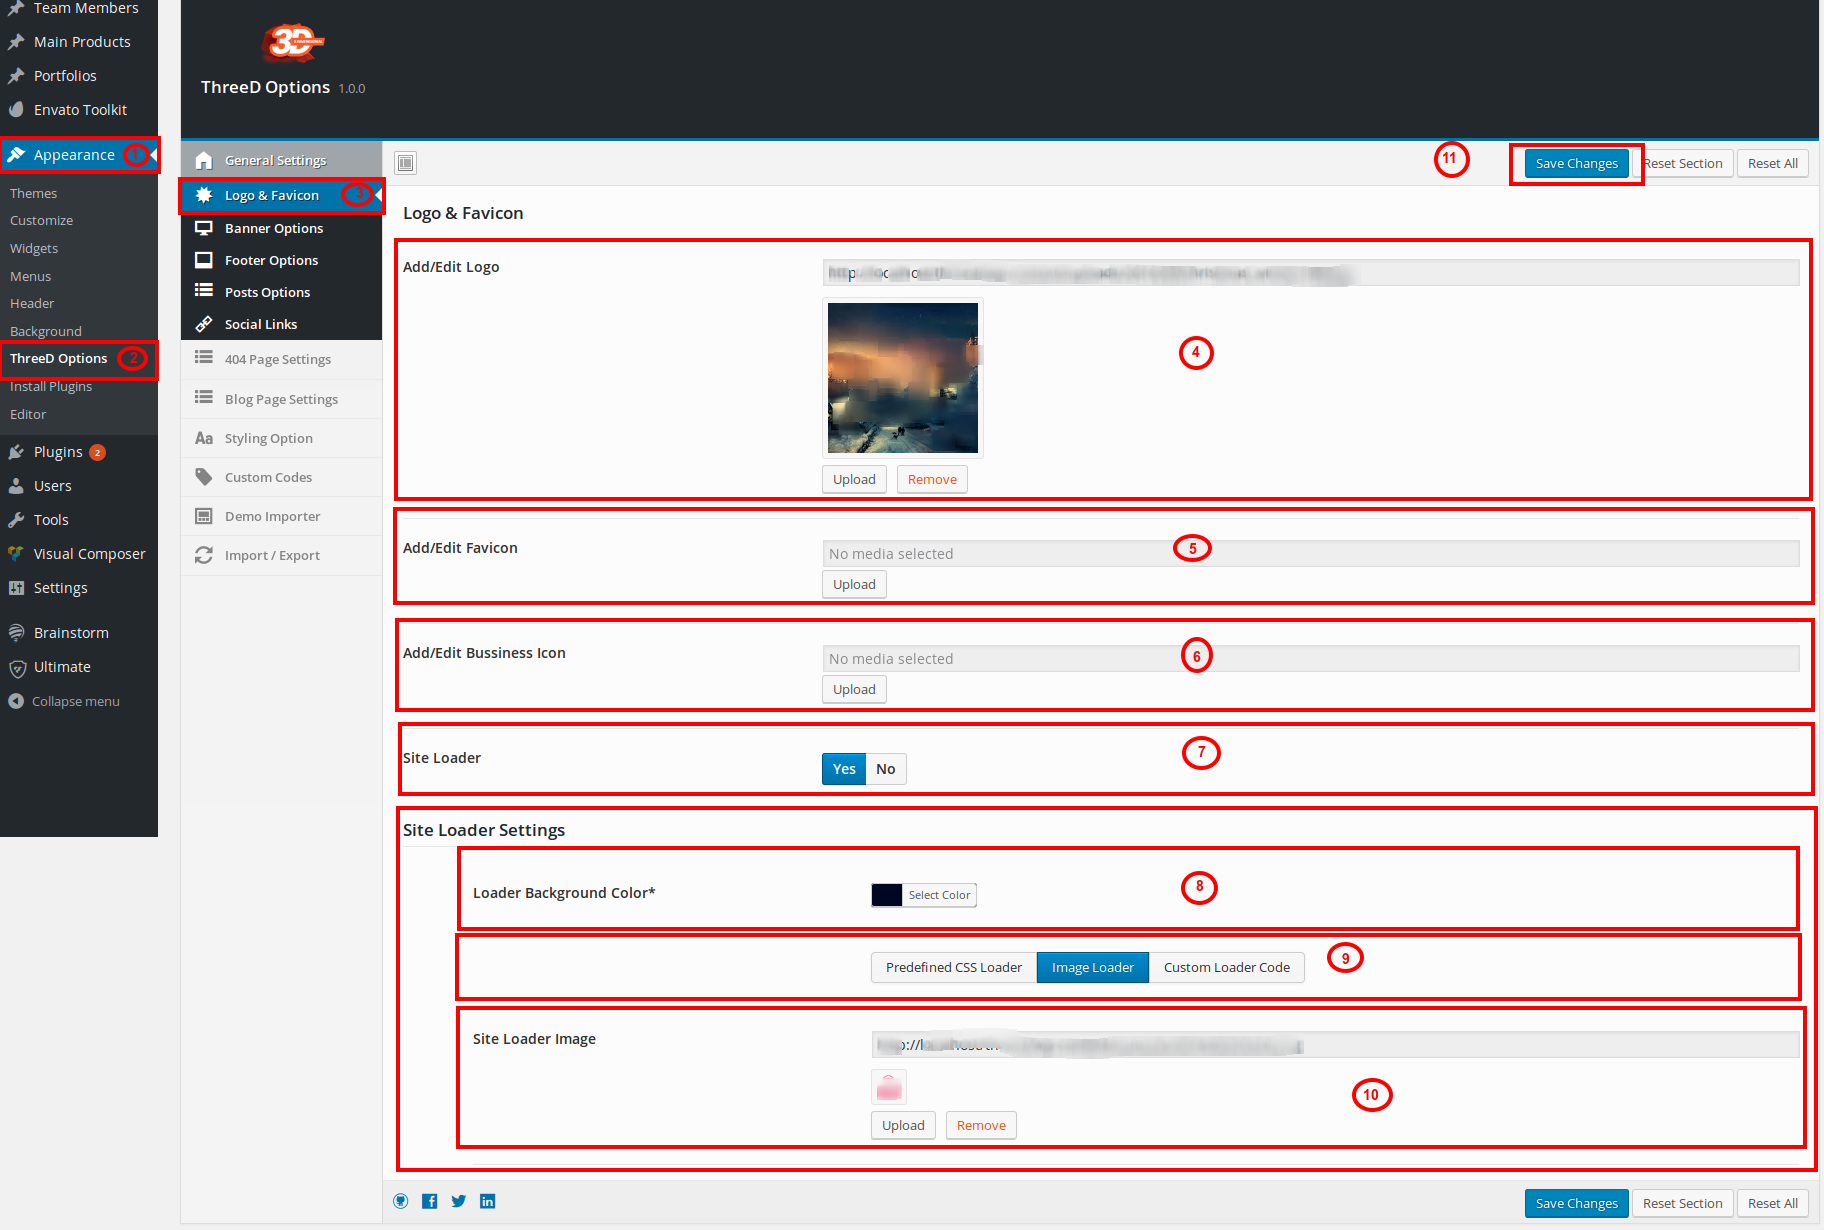
- 1. Click on Appearance.
- 2. Click on ThreeD Options
- 3. Click on Logo & Favicon
- 4. To add logo, click on Upload button. To remove click on Remove button.
- 5. To add Favicon, click on Upload button. To remove click on Remove button.
- 6. To add Bussiness Icon, click on Upload button. To remove click on Remove button.
- 7. To Show the site loader make the check "YES".
- 8. Pick color for the site loader background color.
- 9. Click on Import Image to enable image uploader .
- 10. Uploade site loader images from here .
- 11. Click on Save Changes button to save all the settings.
-
Banner Options
- Banner : There two types to banner option available, 1 is Static Banner, 2 is Banner Slider where you can put the Revoultion slider shortcode.
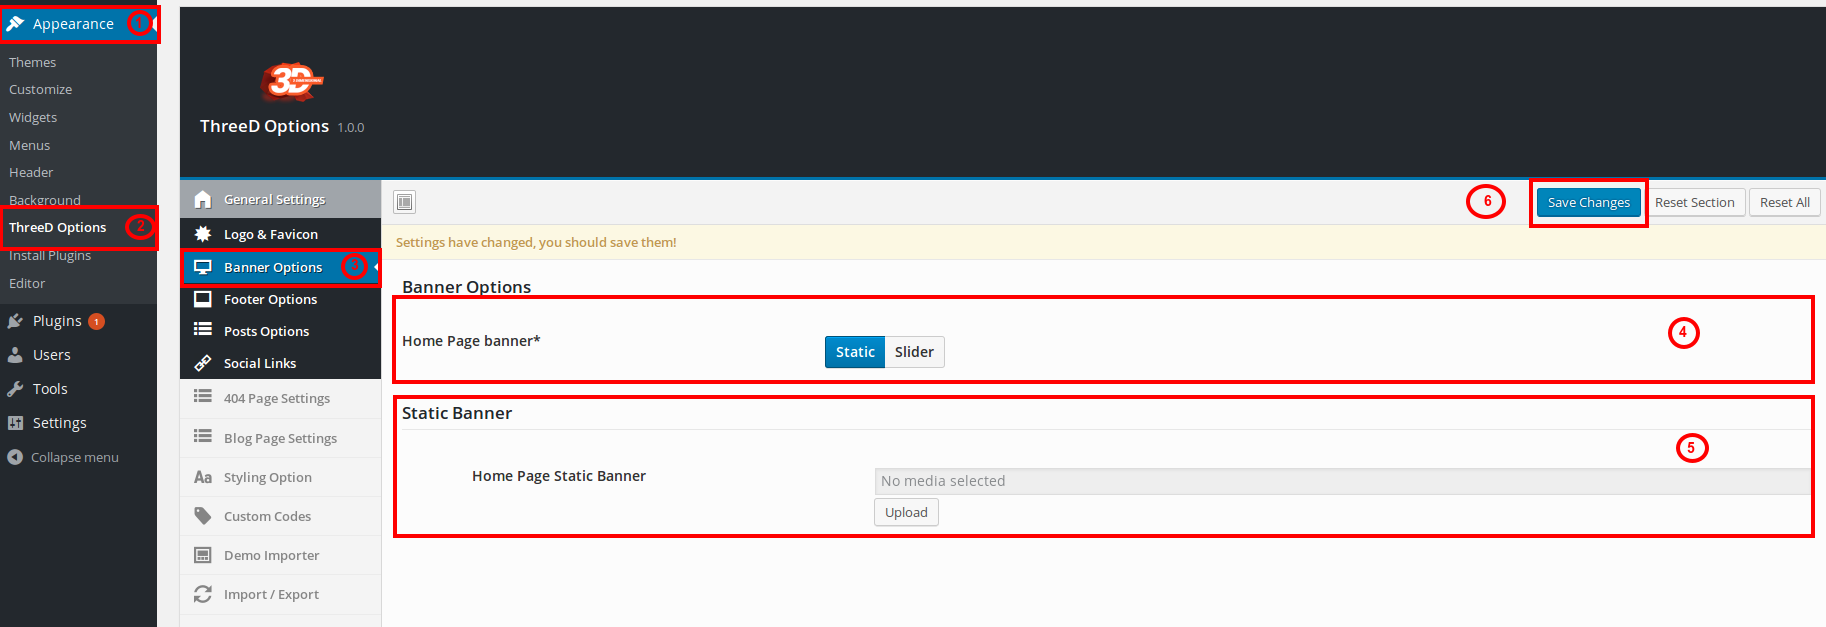
- To Set Static Banner
- 1. Click on Appearance.
- 2. Click on ThreeD Options
- 3. Click Banner Options
- 4. Click on static
- 5. Upload the static image.
- 6. Click on Save Changes button .
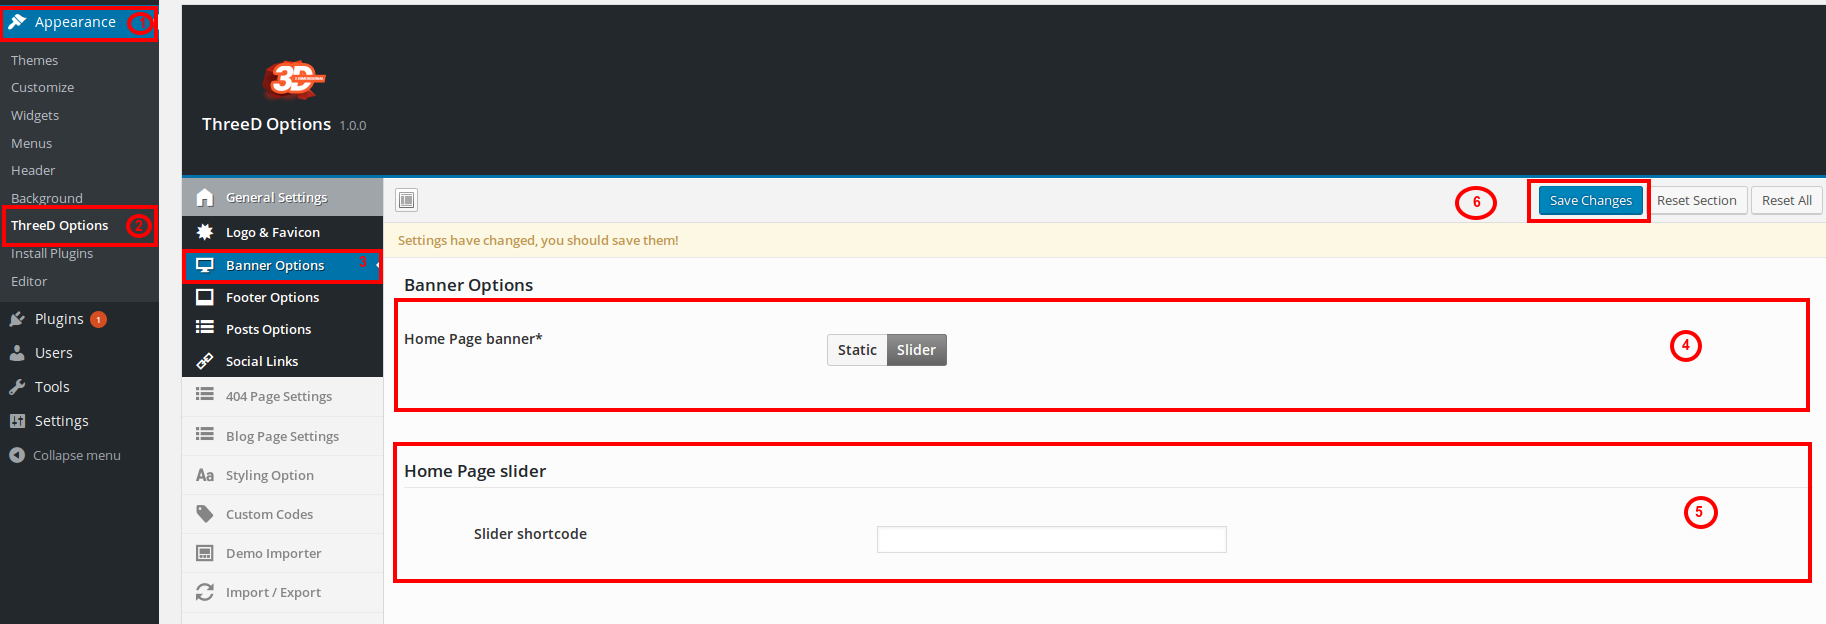
- To Set Slider Banner
- 1. Click on Appearance.
- 2. Click on ThreeD Options
- 3. Click Banner Options
- 4. Click on Slider
- 5. Paste your slider shortcord.
- 6. Click on Save Changes button .
-
Footer Options
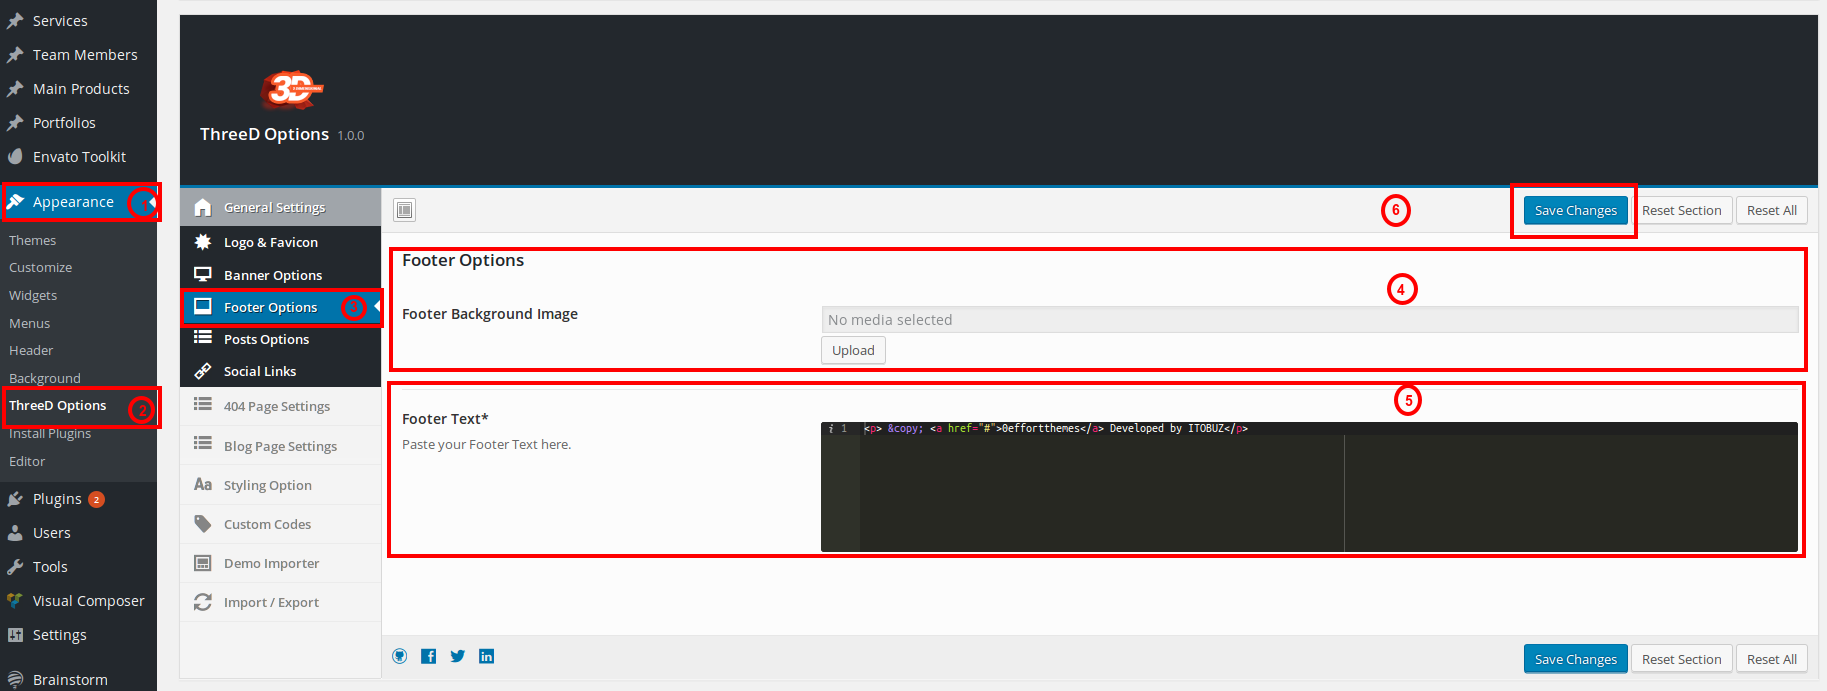
- 1. Click on Appearance.
- 2. Click on ThreeD Options
- 3. Click Footer Options
- 4. Upload the background image for the footer section.
- 5. Add Footer text.
- 6. Click on Save Changes button to save all the setting that you have edited.
-
Posts Options
- Social Links : To maintain the social links in the whole site, you can easily add the links and titles of your choices.
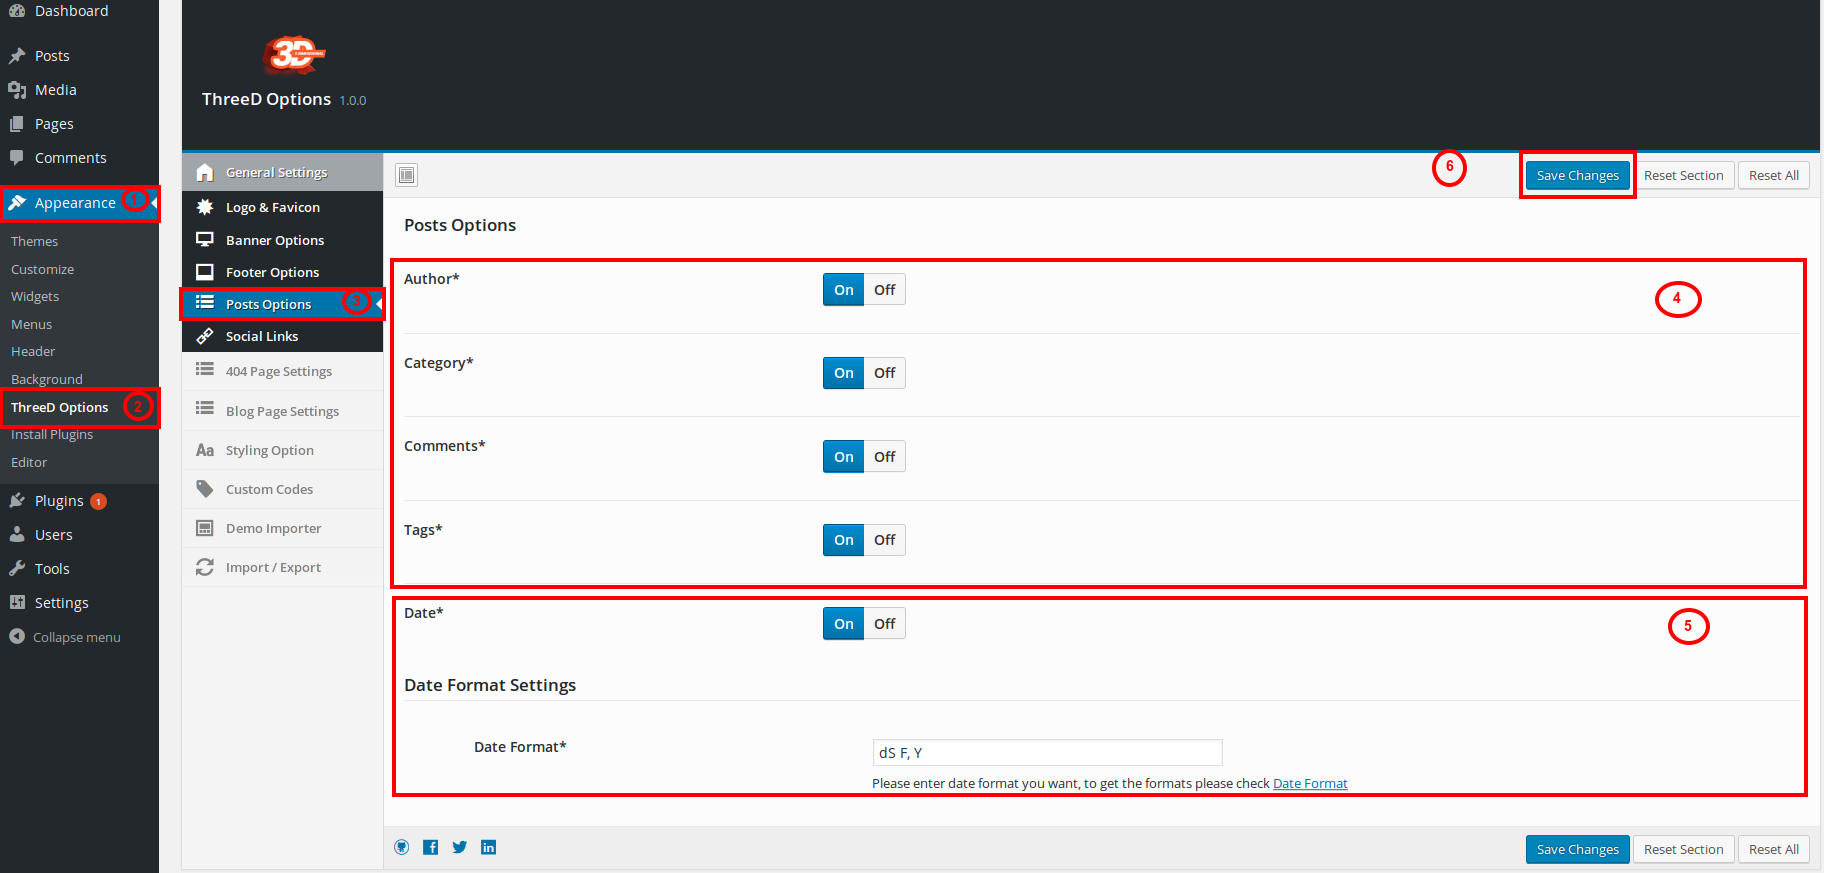
- 1. Click on Appearance.
- 2. Click on ThreeD Options
- 3. Click on "Posts Option" to get post option setting page.
- 4. You can display Author Name, Category Name, Comments and tags by selecting "ON" button respectively.
- 3. You can set the Date format for the shown date with Posts. If blank default will be taken.
- 4. Click on Save Changes button to save all the setting that you have edited.
-
Social Links
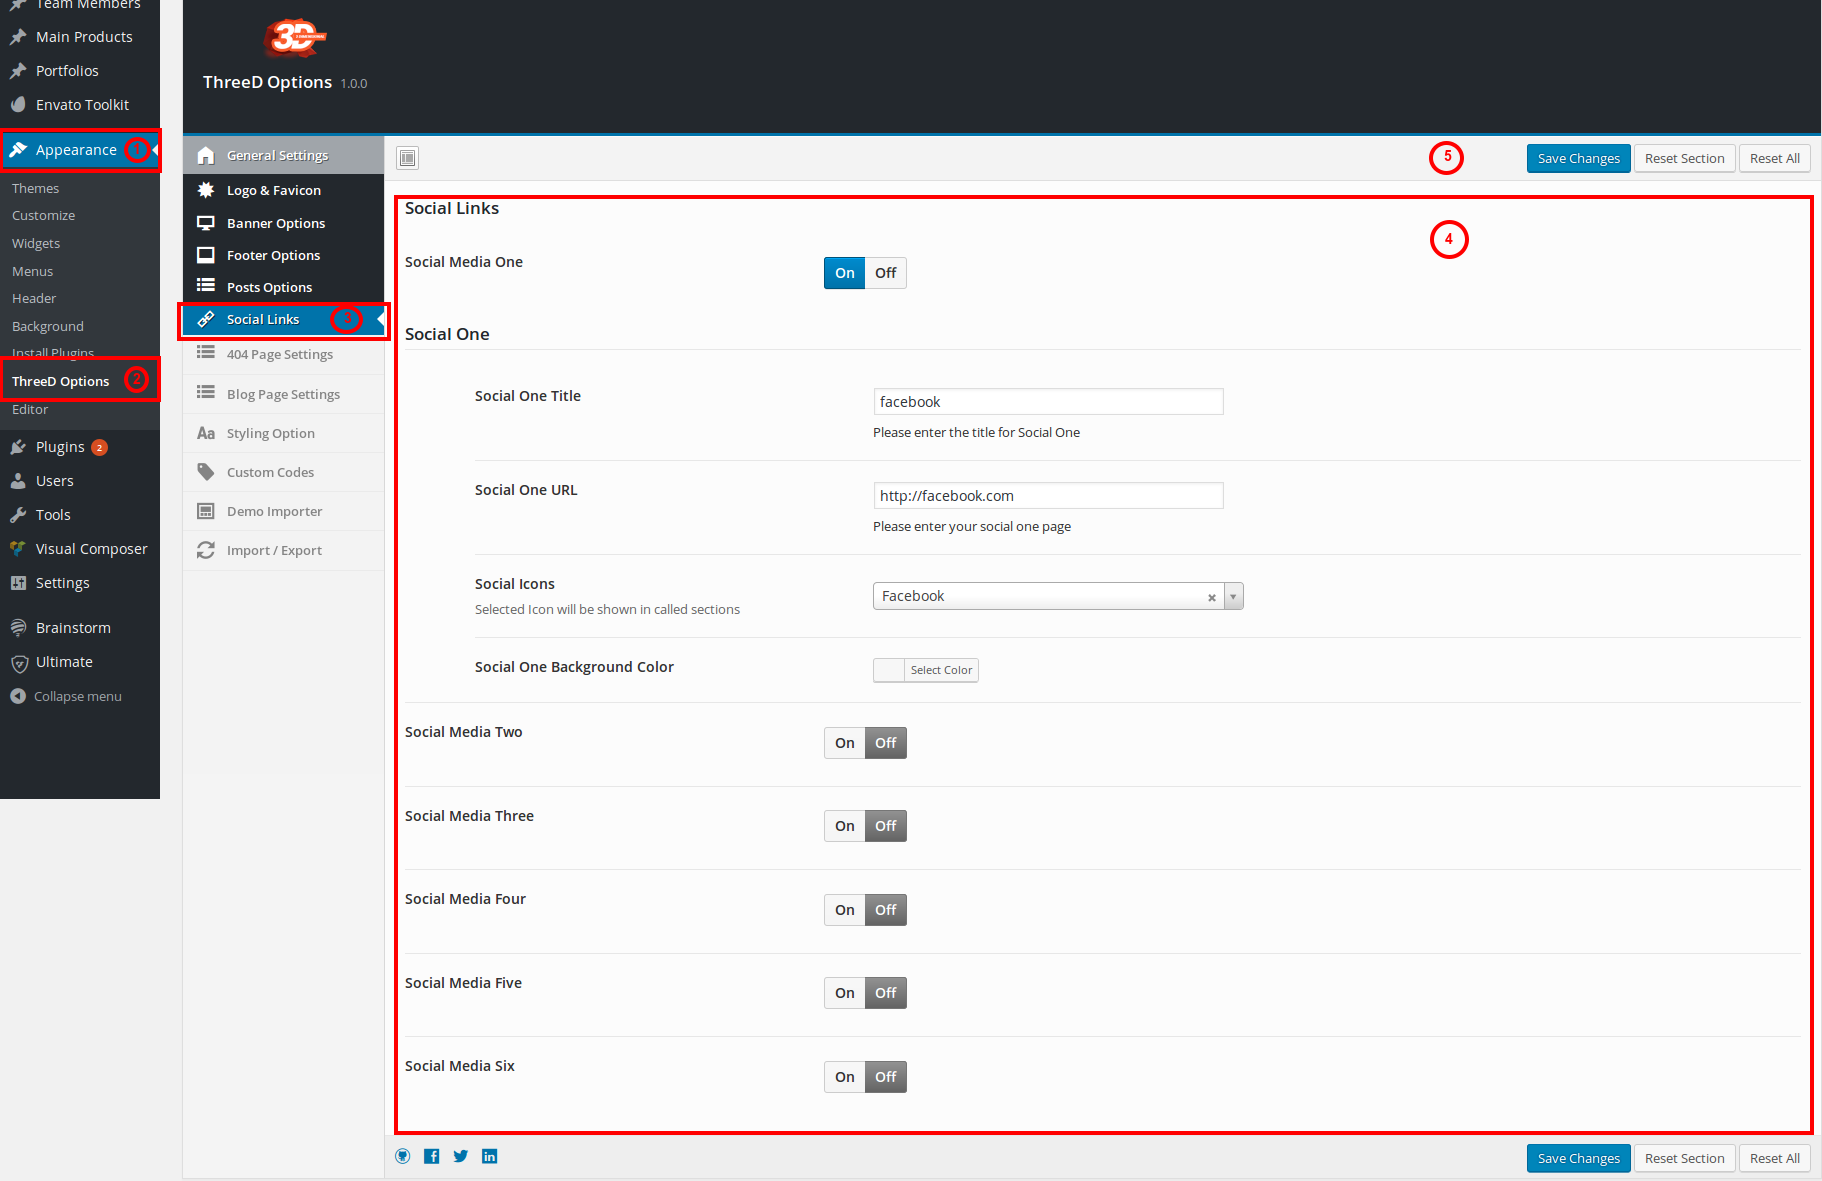
- 1. Click on Appearance.
- 2. Click on ThreeD Options
- 3. Click on "Social Links" to get Social Links options.
- 4. Add Social URL, Title and Icon and Background color .
- 5. Click on Save Changes button to save all the setting that you have edited.
-
404 Page Settings
- 404 Page Settings : To set the 404 Page and content
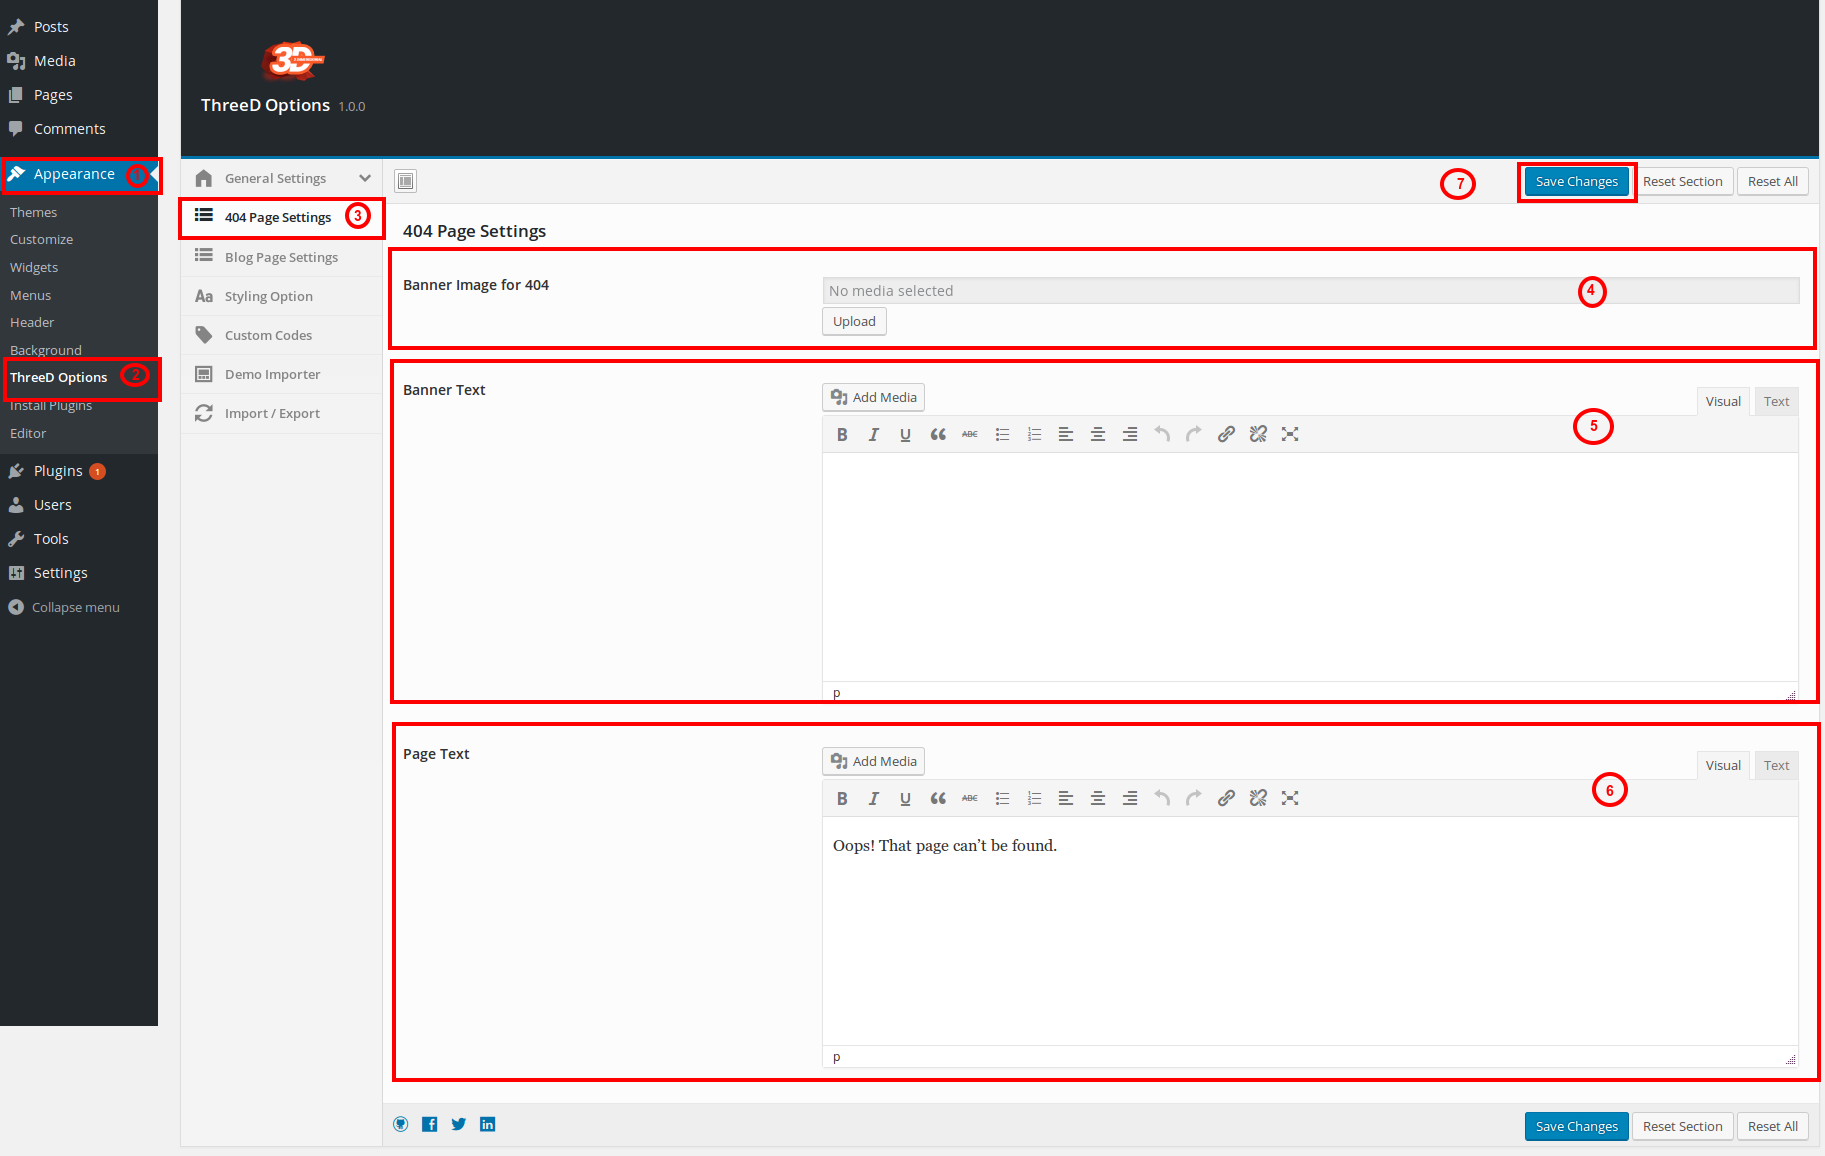
- 1. Click on Appearance.
- 2. Click on ThreeD Options
- 3. Click on 404 Page settings to go on 404 Page settings page.
- 4. Add Banner image for Page.
- 5. Add Banner Text for Page.
- 3. Add Page Text for Page.
- 7. Click on Save Changes button to save all the settings.
-
Blog Page Settings
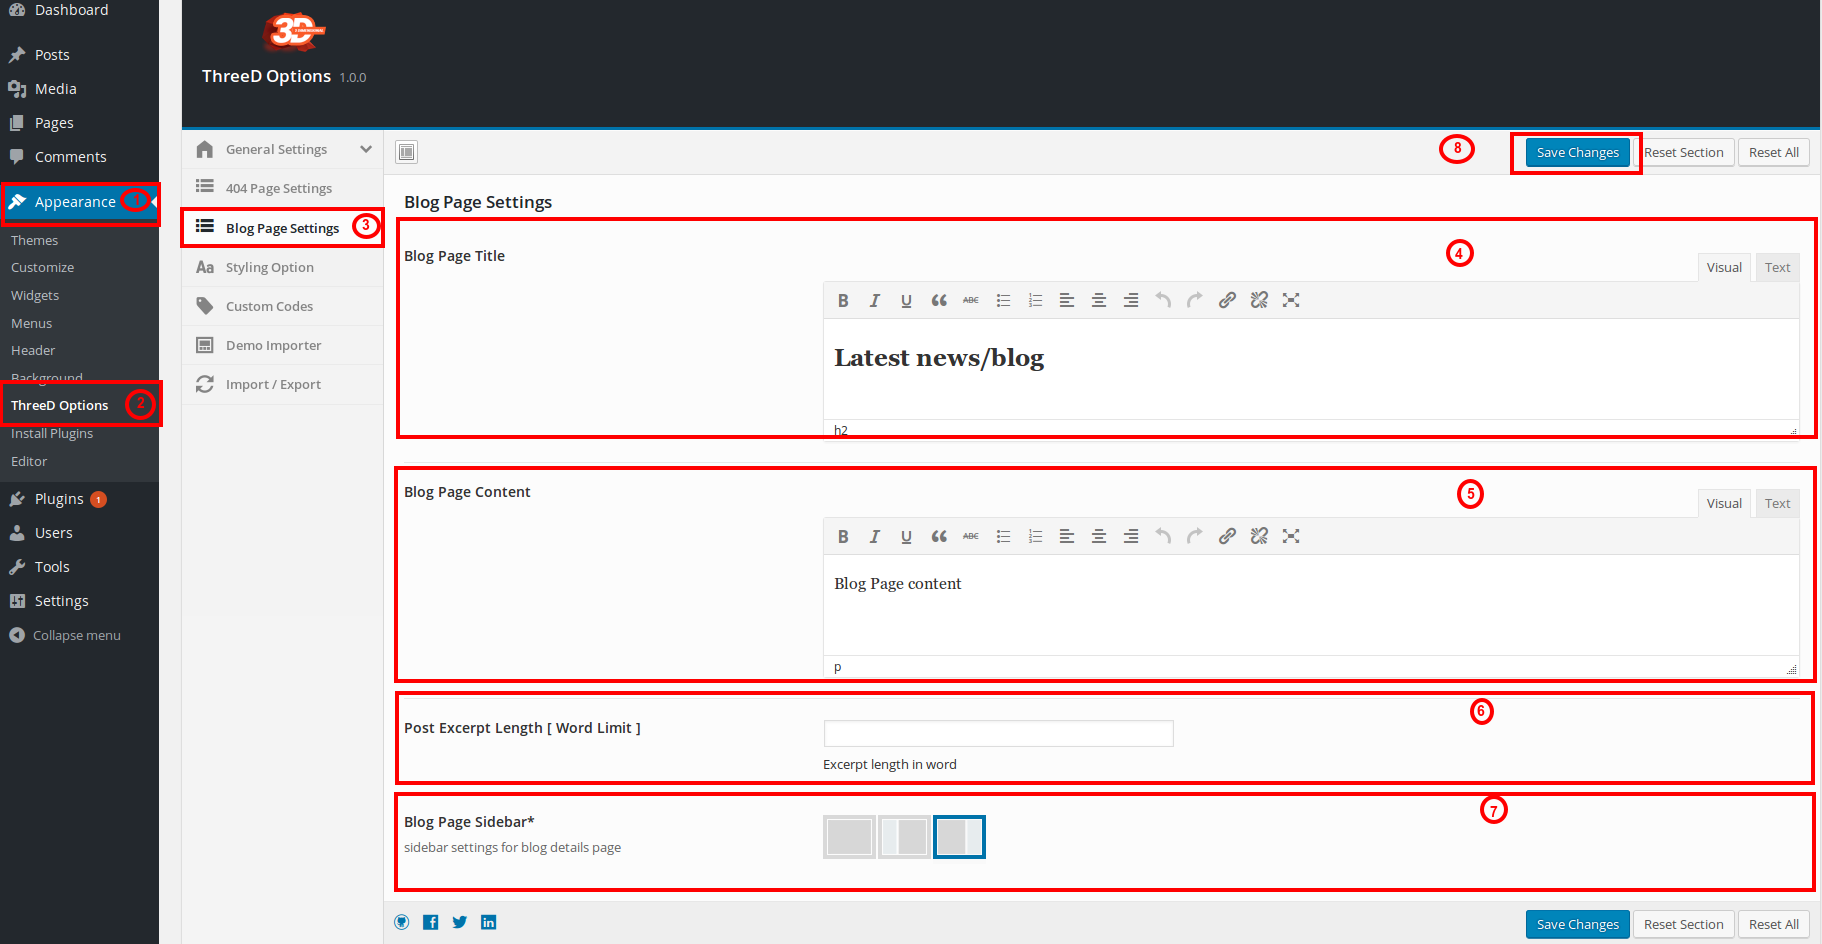
- 1. Click on Appearance.
- 2. Click on ThreeD Options
- 3. Click on "Blog Page Settings".
- 4. Add your Title here .
- 5. Add content for the Page.
- 6. Enter Post Excerpt Length (Word Limit).
- 7. Select the layout from here.
- 8. Click on Save Changes button to save settings.
-
Styling Options
- All Heading Tag Styling

- 1. Click on Appearance.
- 2. Click on ThreeD Options
- 2. Click on " Styling Option" to go on the Styling Option settings page.
- 4. To set the font family,color and font size of heading tag "H1 to H6" , you can select the fonts from the drop down list.
- 5. Click on Save Changes button to save all the settings.
Note: This option would work only, if there is no class in the heading tags .
-
Custom Codes
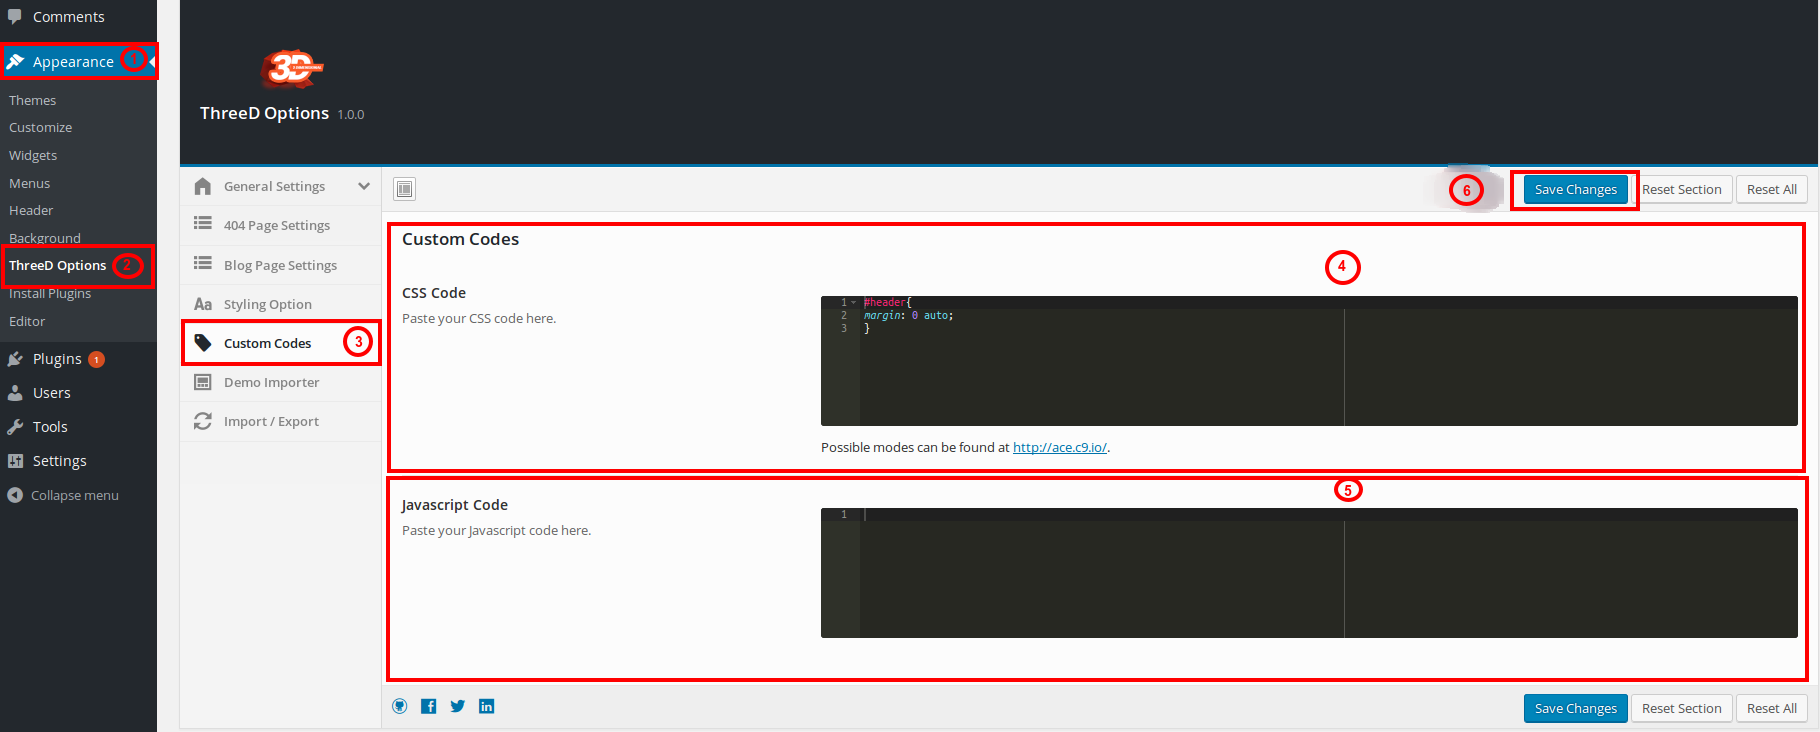
- 1. Click on Appearance.
- 2. Click on ThreeD Options
- 3. Click on "Custom Code".
- 4. CSS : Put your custom CSS here.
- 5. Javascript : Put your custom javascript code here E.g Google Analytics.
- 6. Click on Save Changes button to save all the settings.
-
Demo Importer
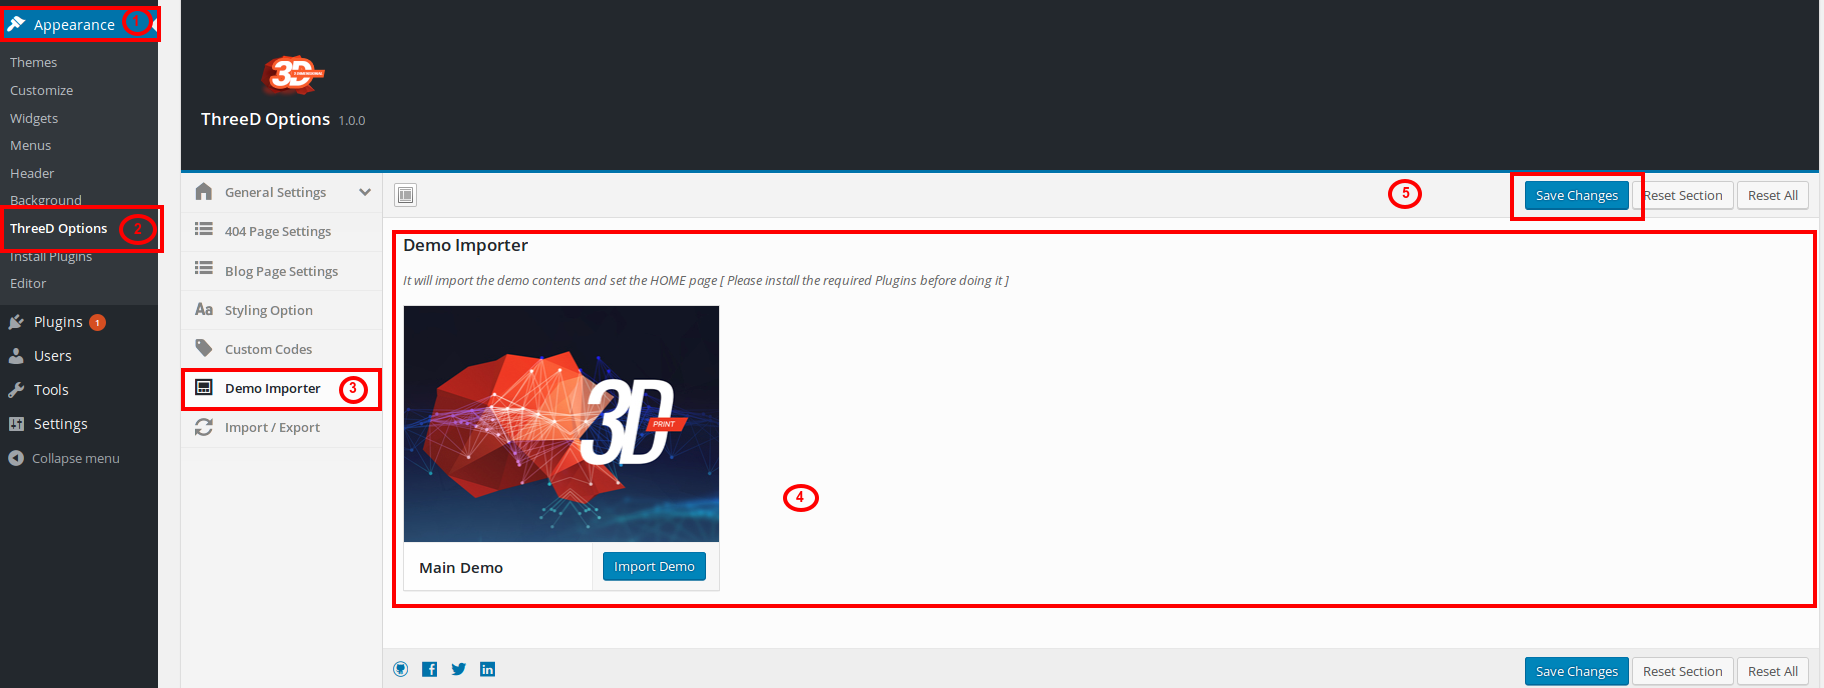
- 1. Click on Appearance.
- 2. Click on ThreeD Options
- 3. Click on "Demo Importer".
- 4. To get the demo content accoding to our demo site.
- 5. Click on Save Changes button to save settings.
-
Import/Export
- Import & Export Theme Settings
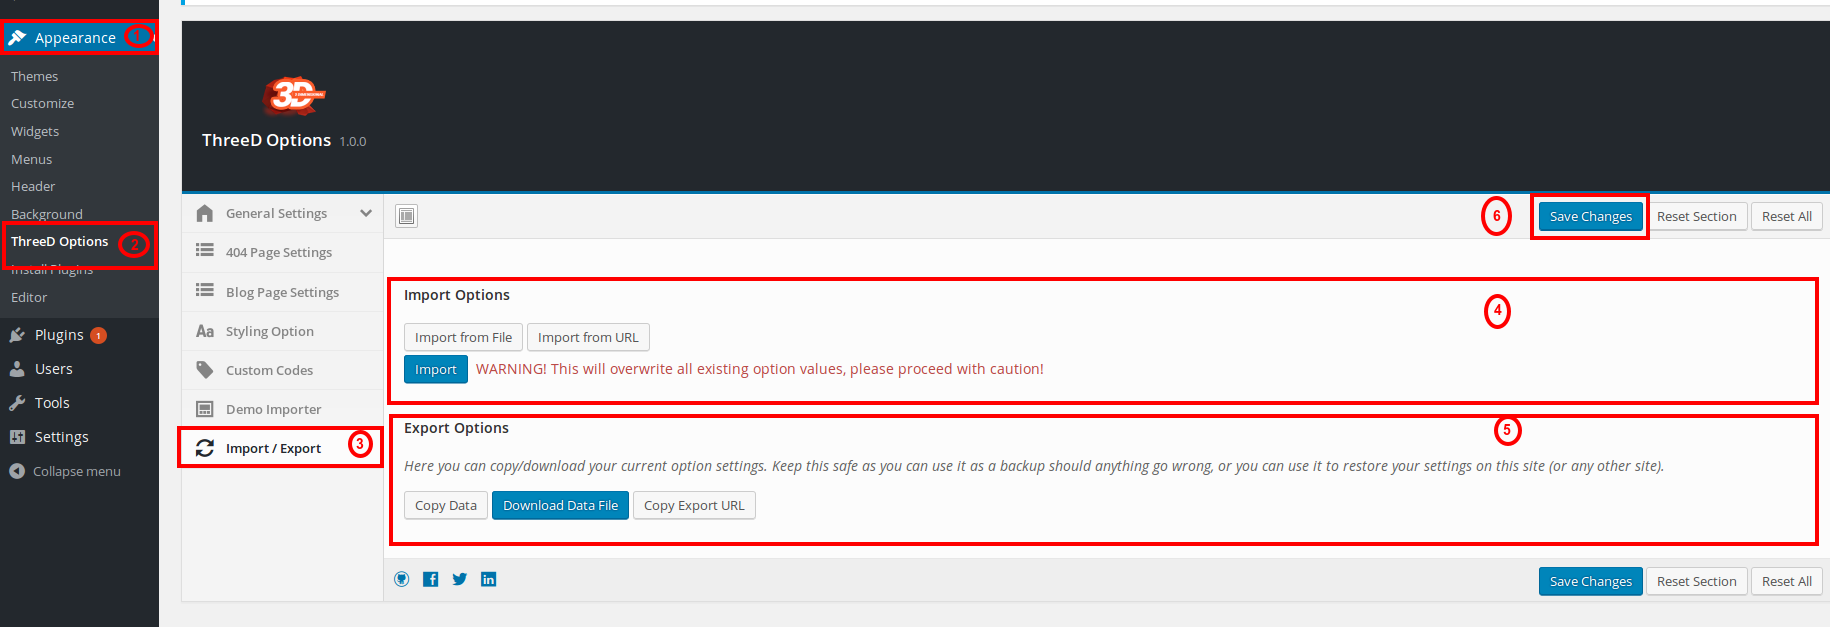
- 1. Click on Appearance.
- 2. Click on ThreeD Options
- 3. Click on Import/Export
- 4. To Import all the setting of theme option,click on import . You can import all the setting from threed_option_settings.json file . Please find it from the theme packages.
- 5. To Export all the theme option settings .
- 6. Click on Save Changes button to save settings.
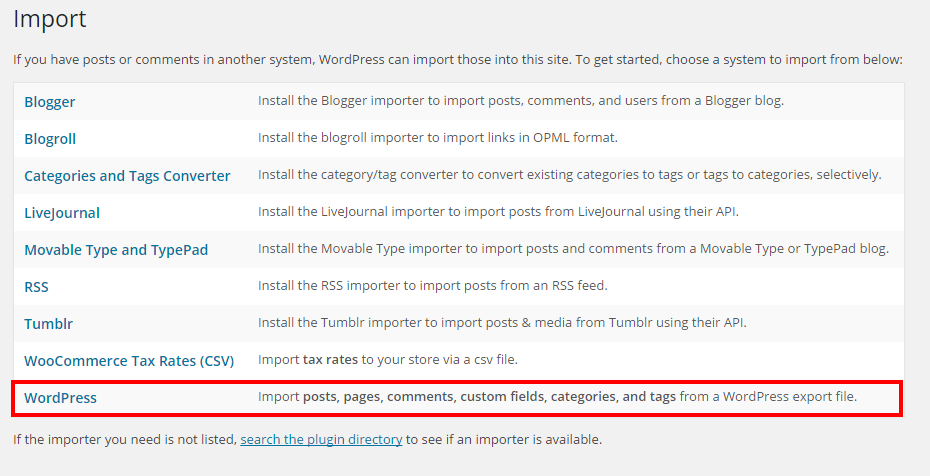
Set Demo Content
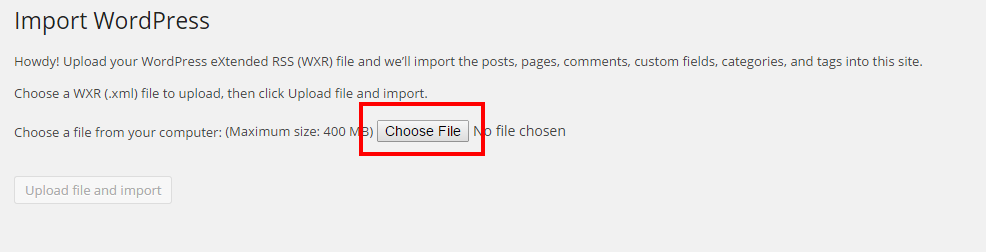
Go to Tools Import
Click into Wordpress to import the contents. If wordpress importer is not installed, it will ask you to install and activate the plugin before import.
Before you import please check that the Required Plugin should be installed
After Importing you need to Import the Revolution Slider Files
You also need to set the Home page, Navigation manually
Browse the demo content File(s) : Theme Folder DemoContent [ File Name: demo_content.xml or If you find any issues with full demo content you can have the Indiviual demo files for Pages, Posts and Other Importables are available in Partial Demo Content folder ]
Partial Demo Content
- Pages : threed_demo_pages.xml
- Posts : threed_demo_posts.xml
- Medias : threed_demo_medias.xml [ For Media Files ]
- Navigation : threed_demo_navigation.xml
- Porducts : threed_demo_products.xml [ Woocommerce Products ]
- Contact Form : threed_demo_contact_form.xml [ Contact Form 7 Form ]
- Main Product : threed_demo_main_products.xml [ Custom Post Type ]
- Team Member : threed_demo_team_members.xml [ Custom Post Type ]
- Services : threed_demo_services.xml [ Custom Post Type ]
- Protfolio : threed_demo_portfolio.xml [ Custom Post Type ]
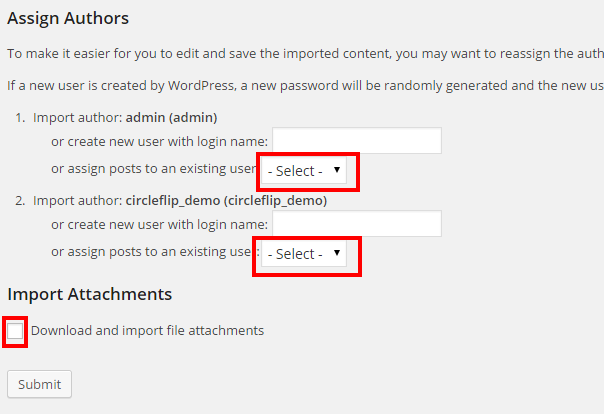
Please select Author and check the Download and import file attachments (for images other related files to post and pages) before submitting it.
Sample Content Duplicated or Failure Issue
When you import the sample content it can take several minutes depending on the speed of your server even sometimes it fails to import. Each time the button is clicked, it will import the content, so if it is clicked twice, it will import everything two times. There are two ways of removing duplicate content.
To avoid duplication of demo data we can use the WP Reset Plugin which will remove all content from your database and leave the default theme activated. It does not remove plugins, but will deactivate them and remove all pages, posts, menus, sliders, widget data, theme options, etc. Basically it removes all the content that you imported from our theme. Only do this if you are able to start over.
WP RESET PLUGIN
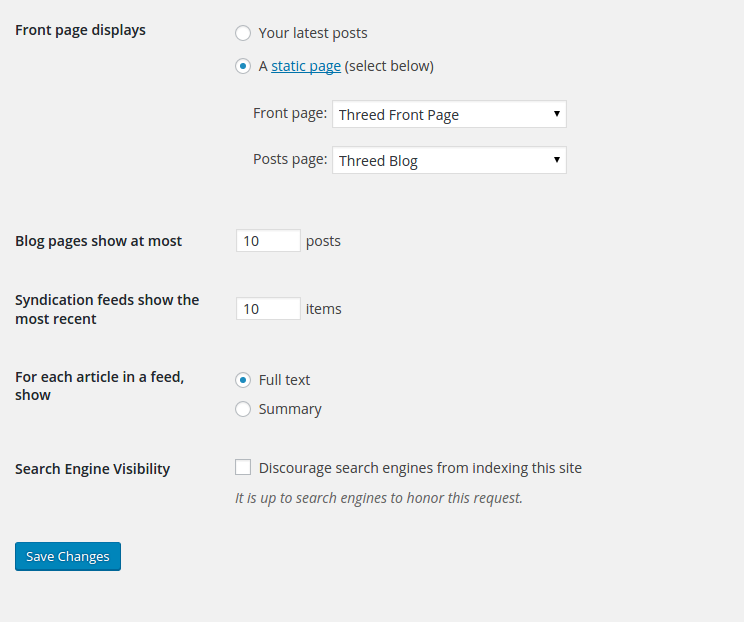
Site Settings
For settings, Go Settings Menu.
- Reading Settings : create a page with default template and select it as Front Page.
Support Team
We always try make our themes errors and bugs free.
If you still found any error or bug in theme please let us know to fix it ASAP and update the same.
[email protected]
If you need any help or assistance in installation or setting up this theme or you are facing any difficulties in using this theme,
you just need to contact our dedicated support team. Just goto our Support site.
Image courtesy
Content and other details
Main resources:
- http://rapid3d.co.za/3d-printers/production.html
- http://www.imaginarium.co.in/verticals-automative.php
- http://3dprinting.com/
3d shoe :
- https://www.google.co.in/imgres?imgurl=http://www.3d-printing.net/sites/g/files/g428001/f/styles/large/public/shoe_black_stilleto_0.jpg%253Fitok%253DOL83XeI1&imgrefurl=http://www.3d-printing.net/tags/shoes&h=500&w=635&tbnid=wP3QhJVGLvSqyM:&docid=28zOosL0XuuIcM&ei=gQrHVt_gFoWSuASm7LzYCA&tbm=isch&ved=0ahUKEwifpbKA6oPLAhUFCY4KHSY2D4sQMwgkKAgwCA&biw=2560&bih=955
- https://www.behance.net/gallery/33882492/Eco-Birds
- https://www.behance.net/gallery/33974760/profilove-II
- https://www.behance.net/gallery/30852511/Papilarnie-III
- https://www.behance.net/gallery/33802748/Oddity-s
- https://www.behance.net/gallery/33693012/WHITE-WALKER-3D-Sculpture
- https://i.materialise.com/blog/3d-printing-copper
- http://www.shapeways.com/product/JPR9ABDEP/tiny-foxtato-believes-in-you?li=featured&optionId=57747610
3d printers image
- http://www.tinkernut.com/portfolio/how-to-make-a-cheap-3d-printer/
- https://www.kickstarter.com/projects/formlabs/form-1-an-affordable-professional-3d-printer
3d animated Watch
- https://www.behance.net/gallery/20059327/LICHEN-exosqueleton-watch
Logo images
Shop images and content
Verticles contents
- http://www.imaginarium.co.in/verticals-automative.php
Images:
- https://www.behance.net/gallery/31548331/Mercedes-AMG-GT
- https://www.behance.net/gallery/29205821/Diamond-ring
Blog content
- http://3dprinting.com/tips-tricks/
What is 3d printing
- Content: www.3dprinting.com
- Video: https://www.youtube.com/watch?v=5ejm7bnWMtU